Sunday, January 31, 2016

Picture Frame Wall Hanging

Hello again!!  Today I am going to share with you a project that I created using picture frames.
I had purchased  3 1/2" x 4 1/2" picture frames that were in a sale bin for only 50 cents each.  Well, guess what I did.  Since I can't turn down a good deal, I purchased several of them.  Of course I didn't know what I was going to do with them, but being a craft person, I figured I would use them someday.  So I created a wall hanging by gluing 4 of the frames together.  My inspiration for this project came from a workshop with Vicki Boutin at the Prima Art Venture.  We used wood boxes.  I decided to use the frames instead.
Here is the completed project.

These are the frames below.


The first thing I did was to remove the stand and the white clasps from the back.  I kept the actual backs of the frames.  I then painted the entire frames with white gesso as well as the backings.   2 coats was necessary because of the colours of the frames.  I wanted lots of texture on the surface of the frames so I applied a coat of white crackle medium from Prima.  Let this dry completely and watch the cracks form.


Next, I selected two spray colours "tea stain" and "glistening waves" from Prima.  I did the tea stain first, and then the glistening waves next.

After everything was dry, I decided on my frame placement and then glued them together with a strong glue.  You can use a heat gun, but make sure that the glue is very hot.  My final placement is different then shown above.  I changed my mind when I went to glue them together which you can see with the completed project.   Next, I selected patterned papers and adhered them to the backing piece of each frame.  I then glued the backings into the frames from the back.

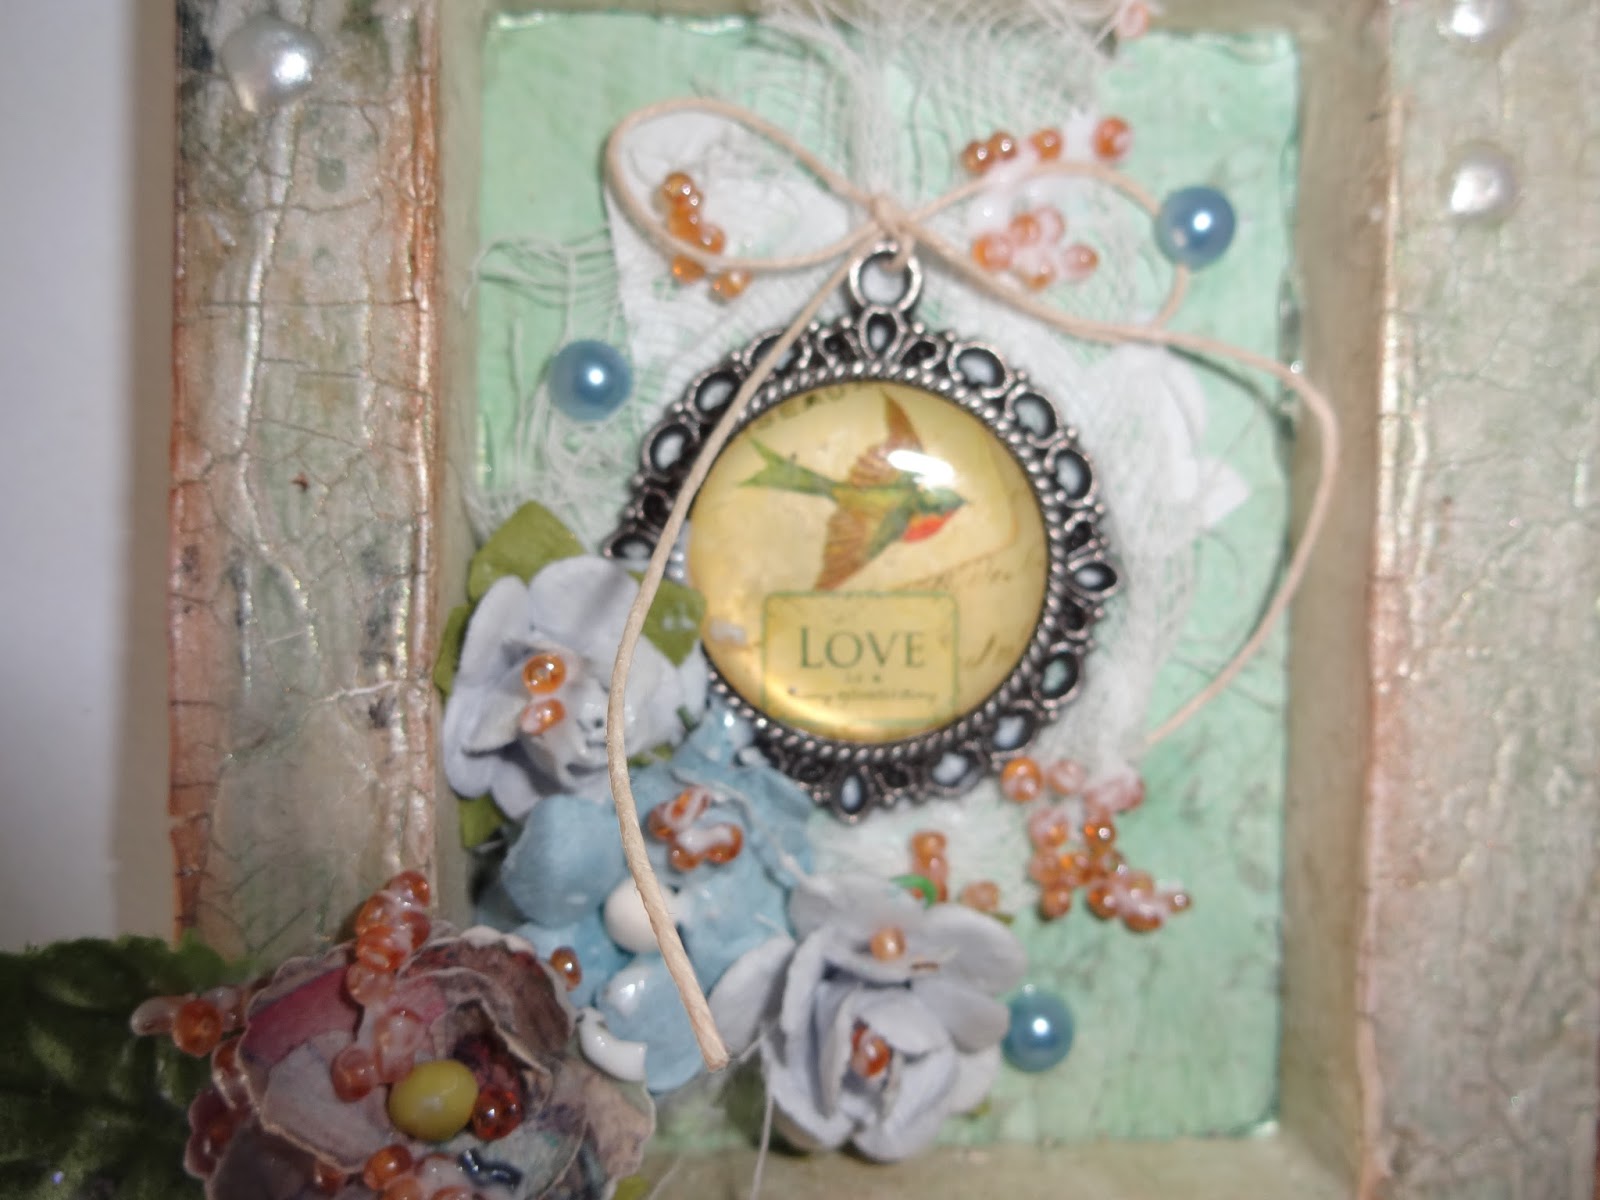
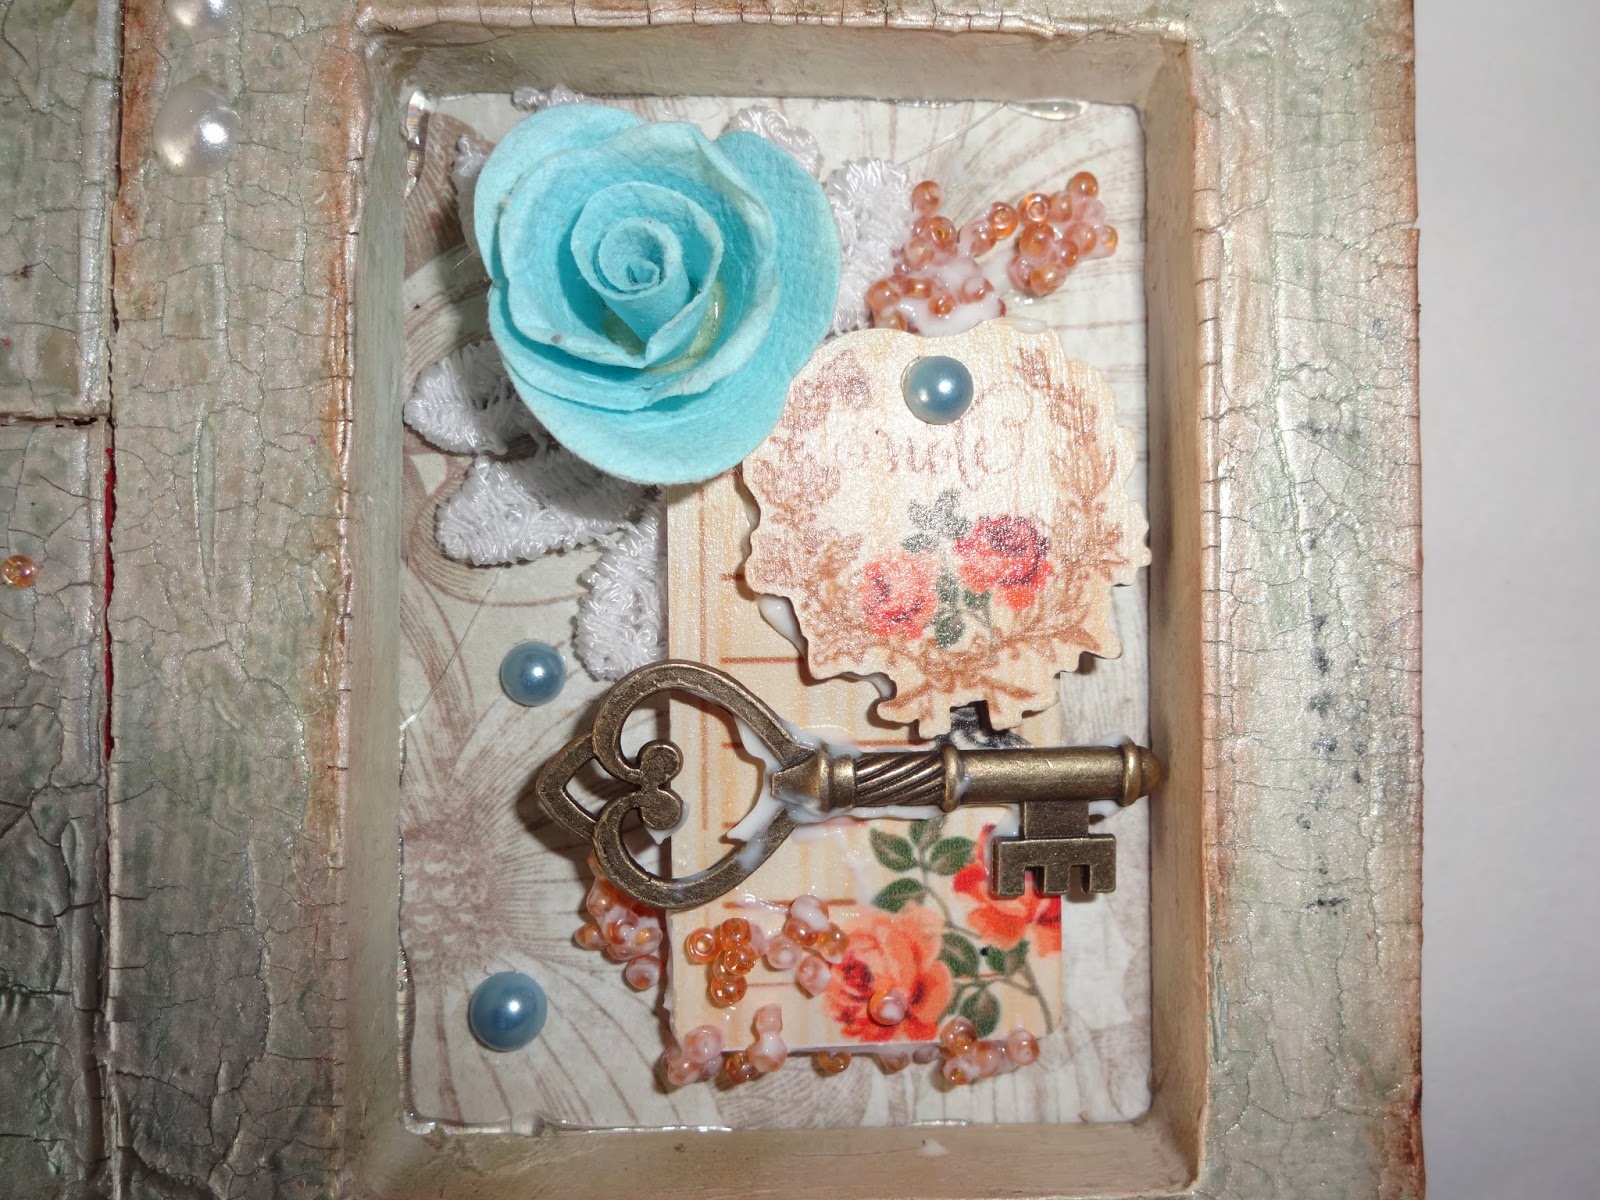
Then I went to my many containers of "stuff" and decorated the inside of the frames.  I used wood embellishments, metal, flowers, and ephemera pieces which I layered several into the bottom left frame.  I added a flower vine onto the left side as you can see.  I also added some glass beads here and there in each frame.  When completely done, I inked the outer edges of the frames with a brown archival ink and added some dots of dimensional pearls. You could also place a very small picture in one of the frames.
Here is a closeup of the inside of the frames.


I am going to do this again but I plan on using  frames in different sizes and more of them.  I will let you know how it works out.  I hope you will give this a try.
Until next time,
This is Donna wishing you a happy and safe week.
"Happy crafting"
"I'm not going to vacuum until they make a model that you can ride on."

Friday, January 15, 2016

New Technique on Canvas

Hello everyone!!!  I am back from California where I attended the Prima "Art Venture".  It was excellent and the workshops were amazing.  Unfortunately, I cannot post the items that we did because of the designer wishes, but each workshop was wonderful and very informative.  We worked with Frank Garcia, Anna Debrowska (Finnibair), Vicki Boutin, John Petersen, Sharon Laakonen, and Sandra Evertson.  A very talented group of people.
I am going to share with you a technique that I learned in the Sharon Laakonen class. I have never done this technique before.  I got to use the new Prima watercolour pastel crayons to create a background on their new watercolour canvases.  It turned out to be easy and fun.  Since I can't show you the actual project we did I did another one at home to show you the technique.
Below is the finished canvas.


To start, you will need the items shown below:  9 x 12 canvas or the size you want, watercolor paper (140 lb. weight is best), a soft brush, watercolor pastel crayons, something for mixing, and a water sprayer.
Since I did not have a watercolour paper canvas, I used a regular 9 x 12 canvas and covered it with a piece of watercolour paper.  You can buy the paper in a 9 x 12 size, however, I found that I had to trim off a slight amount on the edges.  I adhered this securely to the canvas.


I used 4 different pastel colours, vermilion, magenta, dark ochre and dark brown.  Starting with the lightest colour (vermilion) I scribbled some into the a plastic lid, wet it with water, then mixed it with a wet soft paint brush.  The right side of the lid below is the mixed side.  Mix the complete scribble.  They mix very well.


I next lightly sprayed the surface of the paper on the canvas.  Then I applied the vermillion colour in a circular motion.  Keep mixing and adding the colour until the surface of the canvas is covered.  With the surface of the canvas still wet, (you do not have to wash out your mixing item after each colour)  mix the next colour which is the magenta in the lid, and apply it over the first colour but not to completely cover it.  You will mix and blend the second colour here and there making sure that you mist lightly with water.  You want the first colour to show.  Do not press too hard with your brush.  Water to paper can cause pilling which is small balls of the paper forming.  That is why I used a 140 lb. weight paper which is heavier.  I had no pilling at all.  You will do the same with the third colour (dark ochre) again here and there making sure that you spray more water onto the surface of the paper, blending as you go.  I did not use a lot of this colour.  But you can if you want, just as long as you use a light spray of water.
This is a closeup after the third colour was applied.

I let the complete surface dry (you can use a hair dryer for faster drying time).  I then took the dark brown pastel, in the same way as the others and applied this around the entire outer edges blending it toward the centre but not all the way.  The finished canvas surface is below.

To finish the project, I mixed a pink mica powder into modeling paste which I placed here and there with a stencil.  Next I stamped with brown ink a small acrylic stamp to give more texture.  I then made a paper collage that you can see below and adhered this to the canvas in the centre.

My next item is the "diva" which I made using a new Julie Nutting stamp.
I first stamped the girl onto a piece of vanilla cardstock and cut it out.  This acts as the skin tone for the face, arms and legs as well as a base for the pieces that you will create next.   Next I stamped the girl onto a piece of patterned paper.  I then cut out the dress only and adhered it to the cardstock girl onto the dress area.  Next I stamped just the head onto yellow cardstock and cut out the hair which I adhered to the head of the cardstock girl.  I added dimensional pearls to the head band and the waist band, black stickles to the shoes, and adhered a ruffled piece of lace around the bottom of the skirt.


I added the "diva" to the canvas using pop dots, added a chipboard frame embossed with white embossing powder and a piece of patterned paper adhered to the back of the frame.  Flowers were next, butterflies and a bit of bling to complete the canvas.  I am hooked on yet another technique.
I hope you enjoyed this picture tutorial and will give it a try.
Until next time,
this is Donna wishing a wonderful day.
"Don't judge a woman until you've walked a mile in her shoes.  That way, when you say something about her, you're a mile away and you have her shoes."

Sunday, January 03, 2016

8" x 10" Mixed Media Shabby Chic Picture Frame

Happy New Year
Hello everyone!!!  I hope everyone had a very happy Christmas and are having a good start to the new year.
Today's project is a mixed media wood frame.  The frame is a very inexpensive one that I found stored in one of my closets.  So I decided to remake it.  I first took off the back of the frame.  It is made of
chipboard so I decided to use it for my background.  The completed frame is below followed
 by instructions to complete the mixed media texture to it. 

To start, you will need the following:  wood frame, heavy gesso, and a stencil.  I used the Prima "bamboo" stencil.  I first applied the gesso completely onto the frame itself and the chipboard backing with a spatula.  I wasn't fussy will my application as I wanted lots of texture.  When the backing was dry I applied a generous coat of the gesso with my stencil.  Let the complete frame dry.


I then took Prima white crackle texture paste and randomly applied it to the backing and here and there on the frame.  You can use a heat gun to dry this faster.
I then adhered the backing to the frame using a hot glue gun.
I had a large cotton thread doilie in my stash.  I cut this in half and applied one half going over the frame to the top left corner and the bottom right corner.  A hot glue gun can be used.  I applied the white gesso to the entire surface of the doilie so that the sprays would adhere better, which is the next step.


  I used my favourite colours, turquoise and seafoam with a hint of green here and there.   I sprayed onto the doilie areas, the background and the outside frame as well until I got the look I wanted.  I dried between each spray colour.   Below you can see the crackle paste after the mists were applied.


With a stamp and black staz-on ink I stamped randomly here and there to give even more texture.
And then finally, my embellishments.  For the bottom right section, I first adhered cheese cloth and kept it loose around the frame section.  I added paper to the back of the frame then made a small collage on the left side of the frame.  You could put a picture into the frame if you wanted.  I added flowers in different colours, punched butterflies sprayed to match the flowers, a bit of lace, leaves and a loopy bow with some cording.  At the upper left corner I added a fussy cut flower from a patterned paper that I had along with a couple of leaves then added more flowers down the side with butterflies.   At the end I inked around the outer edges of the frame with a brown distress ink for extra accent.  Below is closeups of the corners.


I hope you enjoy this tutorial and give it a try.  It is a great way to use up some items from your stash.  Before I sign off  I have some exciting news right now.  A friend of mine and I are going to Anaheim, California tomorrow morning (bright and early) to attend the Prima Art Venture workshops.  We are so excited to be able to attend.  Workshops will be held by Frank Garcia, Anna Dabrowska (Finnibair), Canada's own Vicki Boutin, Sharon Laakonen, John Petersen and Sandra Evertson. And of course we will do some touring.  I hope to have lots to share with you.
Until next time,  this is Donna wishing you a happy and healthy new year.  
"HAPPY CRAFTING"
"To the world, you may just be one person....but to one person, you might just be the world."