Friday, April 22, 2016

6 1/2" x 4 1/2" Mini Album

Good morning everyone!!
Today I am sharing with you a mini album that I created using up bits and pieces left over from a previous project.  
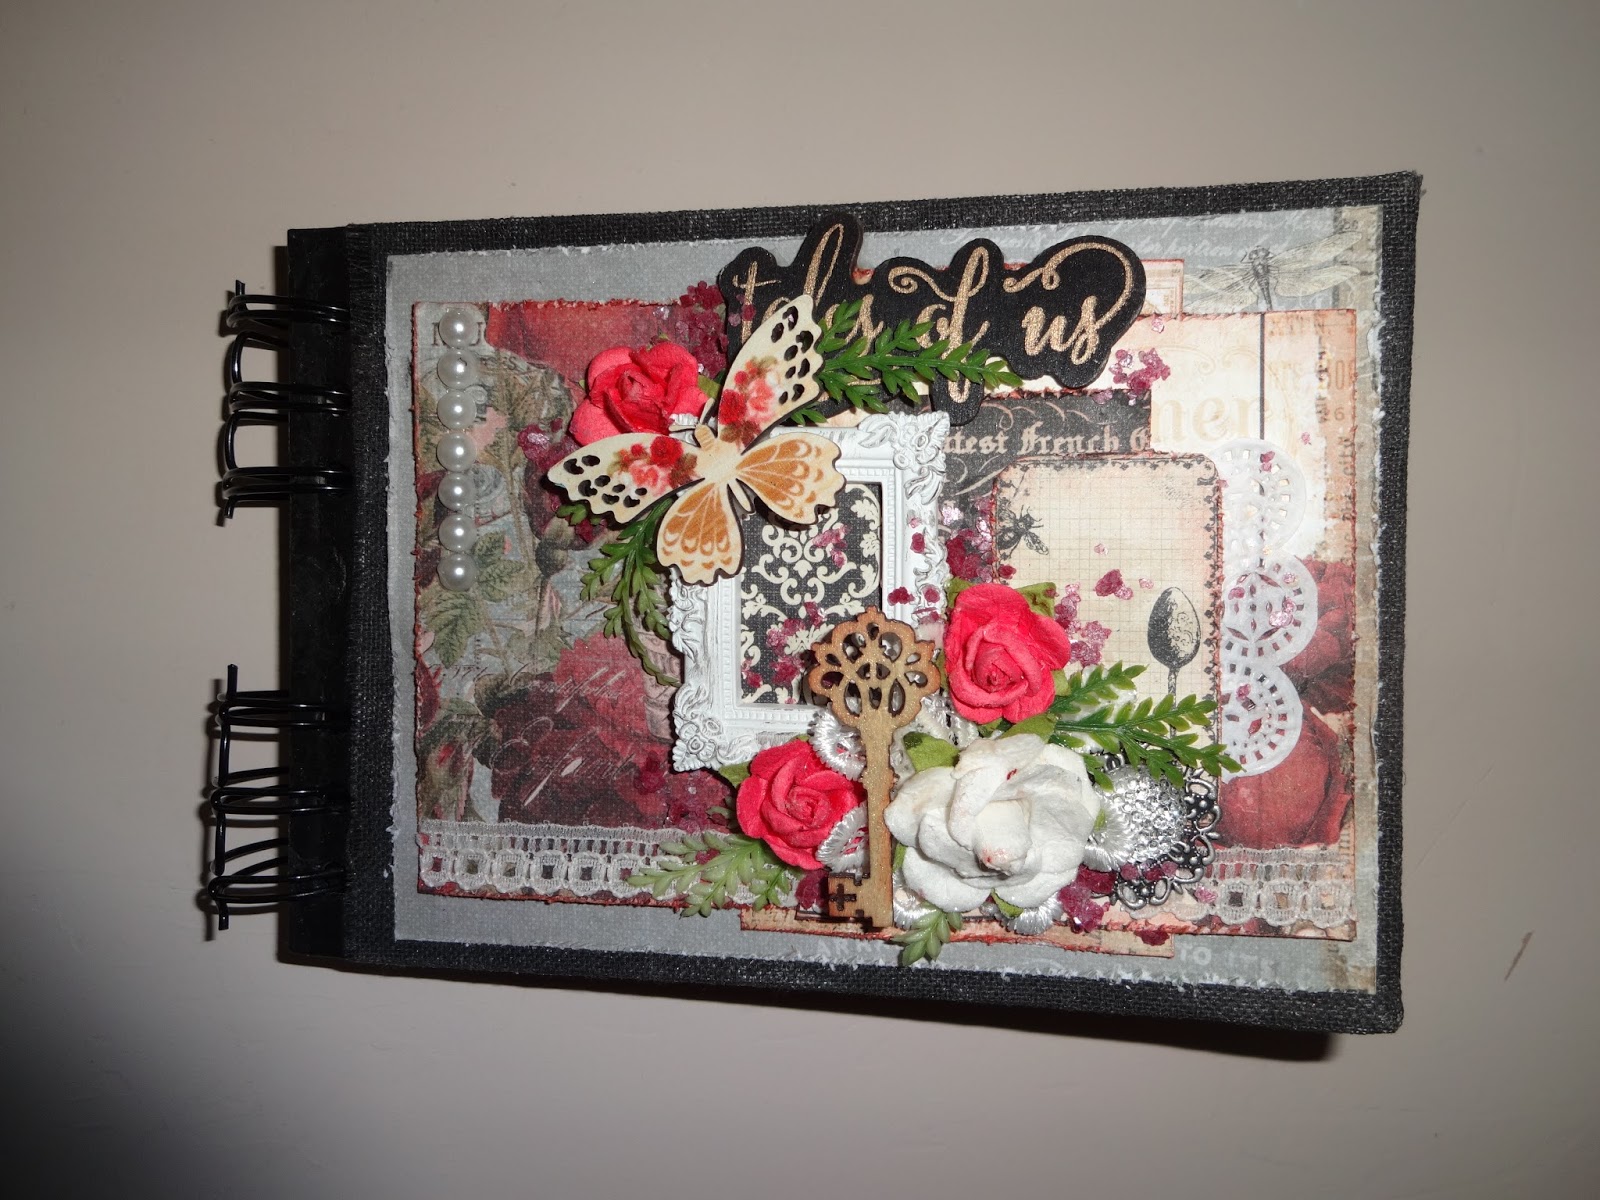
Below is the front cover.
I first removed the wire rings, then I painted my pre-made chipboard album with black gesso keeping the gesso around the outside edges of each page, front and back,  going in about 1".  Unfortunately you cannot see it, but I covered both the front and back covers (on the outside) with muslin to give it more texture.  I then painted the muslin with the black gesso.  I made a paper collage using various pieces of the paper that you see under the frame.  I placed a small doilie coming out from the right side of the paper collage.   Added flowers, wood key, wood butterfly and greenery.


The inside of the front cover is next.  The centre section I adhered with pop dots to give it a 3-D look.  Added a metal corner and metal flower to the bottom left and a metal circle with flower, greenery and a small heart made from polymer clay.  I love using polymer clay and making embellishments with it.  So I made a lot of different shapes and tucked them away for a rainy day.  I glued glass beads on the surface of the heart.
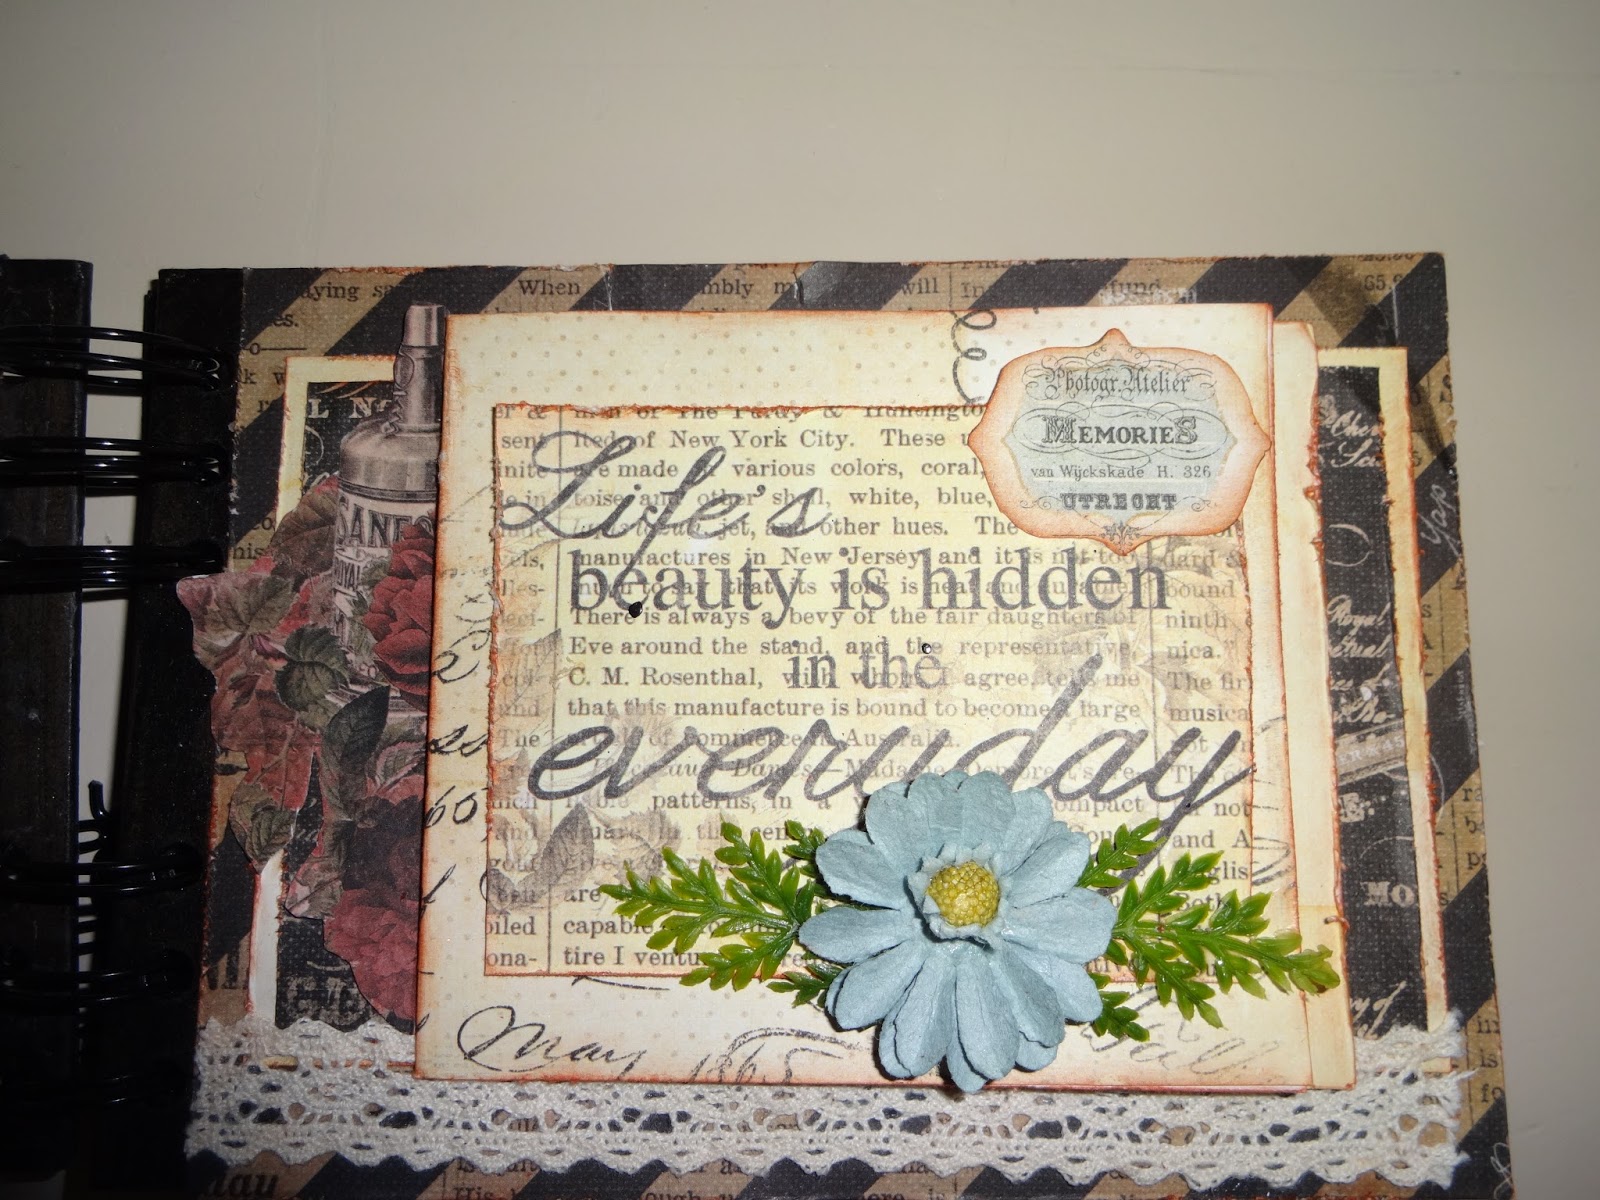
First Inside Page
This is a fold out page so I can place my pictures inside.
There is a paper piece on the left side of the centre fold out section.  I fussy cut this from one of  the paper pieces.


Back of First Page
This I kept simple and added a small metal decorative frame with a flower, die cut lattice piece and a loopy bow.  In the centre of the frame I placed a large sparkly gem.


Front of Second Page
Again, kept it simple.  I fussy cut a flower section, added a small piece of the die cut lattice, a bit of cheesecloth under the flower.


Back of Second Page
This is another fold out page.  I can add 4 pictures to the fold out section.
To make the fold out - score 1/4" in from the left side of your first piece of paper.  Fold it then wrap the fold around to the back of your second piece of paper and secure the 1/4" part only.  Do the same with the second piece of paper onto the third piece of paper.  The entire third piece of paper will be adhered down to the page.


Here is a look at the fold out section.

And lastly, the inside of the back cover.

I am so glad I kept my scraps from this paper.  It is one of my favourites.  
This album is a great gift idea for someone.
Until next time,
this is Donna wishing you a safe and happy weekend.
HAPPY SCRAPPING!!!!
"Before credit cards, we always knew exactly how much we were broke."
Have a great day.


Friday, April 08, 2016

Working With Polymer Clay

Hello everyone!!
I am heading out on vacation tomorrow so I thought I would share with you a project I did using polymer clay.  I chose a 4 x 6 picture frame and created a floral design using polymer clay.  It was not that difficult to do, so I don't want you to think that I spent hours making it.
This is the completed project.

This is what you will need:  polymer clay or sculpey clay, picture frame, a solid piece for the backing (I removed and used the back of the frame), exacto knife, parchment paper, black paint or gesso, a rolling pin or brayer,  ruler and pencil, and cookie cutters or fondant cutters.


I took a piece of parchment paper and with a ruler and pencil I marked out a 4 x 6 rectangle.  I then rolled out a piece of the clay, very thinly, directly onto the parchment paper and covering the traced out rectangle going over the pencil lines.  Above you can see the start of covering the traced out section.  When I had the parchment paper section covered, I carefully turned the piece over and with an exacto knife and ruler I cut out the section along the pencil lines which you can see through the paper, cutting it through the clay.  I turned it back over and left the parchment paper on the clay.  With a stamp which had a diamond pattern on it. I stamped the entire surface to get some texture.
Now, the fun part.  For the flowers, try to keep the clay rolled out thinly.   With the lighter green clay, I pulled off small pieces and rolled it in my hands to make a thin strip which is the vine base.  I gently pressed them onto the background piece.  I then made my flowers using small fondant cutters:  purple flowers using a very small flower cutter and the leaves using a very small leaf cutter.  The yellow flowers are actually cut using the leaf cutter and arranging them as a flower.  The pink flower, I made by hand by cutting out circles and shaping them until I had them how I wanted  (it acually looks like a lily).  With blue clay I took very small pieces and rolled them into a tiny ball which I placed here and there around the vine. 


 Using the ball end of a tool used for quilling, I pressed onto the blue balls of clay to make a centre.  I also put some very small balls of the clay in the centres of the purple and yellow flowers and for the leaves I scored some vein lines just on the surface.  I then took the same quilling tool and pressed onto the background in the diamond sections surrounding the vine.  Gently press each flower piece onto the vine and the background.   Now you will place the entire piece gently onto a cookie sheet, keeping the parchment paper on the back, and bake for 15-20 minutes at 250 degrees.  Believe it or not the flowers and vine will bake securely onto the background piece.  
When the piece was baked, I carefully removed the parchment paper and adhered the piece to the backing using a strong adhesive.
Lastly, and this is optional, I took black gesso and watered it down with water so I had a very thin black wash.  Using a paint brush I brushed the wash onto the entire piece in small sections and immediately wiped it back with a baby wipe or a wet paper towel.  I only wanted to accent the flowers and vine lightly.  When the wash was dry, I lightly dusted some perfect pearls (the pearl colour) around the vine and flowers to sparkle it up.  Put it in your frame and you are done. 
And there you have it. 
I can't wait to do a larger one in a larger frame or on a canvas. 
Below is a picture of the project without the black wash which is bright and colourful.


I hope you enjoyed this tutorial.  It really is easy to do.  This is my first attempt at this, so if I can do it you can do it.  
Until next time,
this is Donna hoping you stay safe and happy.
"HAPPY CRAFTING"
"Shoot for the moon.  Even if you miss, you'll land among the stars."