Monday, December 22, 2014

Boxing Week Sale!


xmas-figurines.jpg
 
We would like to take this
  time to wish all of our
   customers and their 
      families a very 
             Merry Christmas and the
                  very Best for 2015!!           


Boxing Week Sale
            Out with the old and in with the new!! That's right.. CHA is just around the corner, an we want to make room for some new goodies!!     
 
          So stop by the store from December 27th until closing on the 31st for some great deals!      
 
All seasonal papers and embellishments (includes Spring, Summer, Fall & Winter products) are 30% off.
 
All Christmas papers & embellishments are 30% off.
 
All Halloween paper & embellishments are 35% off.
 
All Christmas (and specially marked) Memory Box, Echo Park, Carta Bella and MFT dies will be 25% off.
 
All brads and eyelets will be 40% off.
 
Scrapbook & Cards 2015 planner and sketch calendar
will be 20% off
 
Stop by the store between December 27 and December 31 to check out all the great deals!
 
(sale does not apply to products on order or hold)


January Classes and Crops           
  
Make sure to check out our calendar for January as we already have a busy month planned with some classes and crops!
 
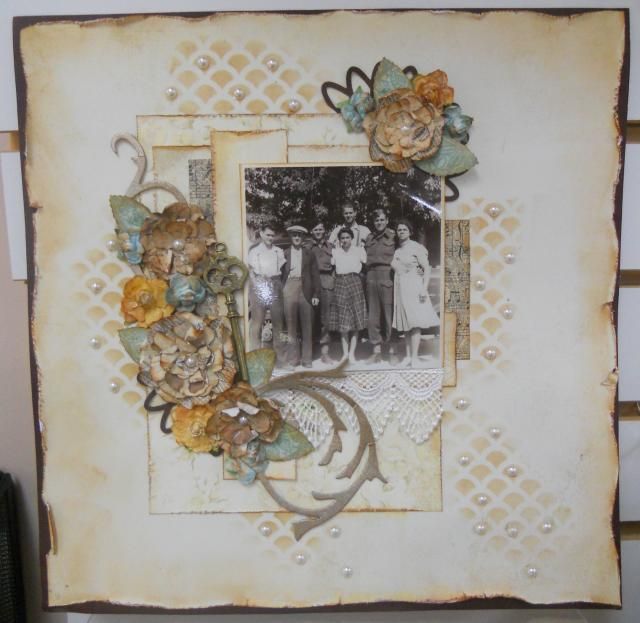
January 10th - Christmas Layout Class! 
 
January 31 - Copic Card Class
 
Crop Nights: January 3 - 4-11pm
                    
                   January 9 - 5-10pm
 
                   January 17/18 - Weekend Crop **SOLD OUT**
 
                   January 23 - 5-10pm
             
                   January 31 - 4-11pm
 
I am sure there will a few more added before the New Year!
 
     Remember to check all the details on our website
 
                                    Calendar             


We're on Facebook!
To find out when new products arrive and all things happening at The Bug, we're posting it all on Facebook...
We'd love it if you LIKED us! 
Go directly to Facebook here  
To follow us on Pinterest go here 
 
 
Sincerely,
Joanne, Helen and Janet

Thursday, December 04, 2014

Today I thought I would share with you three layouts that I recently completed.  I tried to keep them simple and easy.   For the first one below, I cut my various papers then matted them in black cardstock keeping a very fine outline of the black around the pieces.  It pops the papers and adds some dimension.  I also matted the banner pieces in black as well and used pop dots on every other banner piece.  I will be using this matting technique again as I feel it really accents the page.


The second layout below I matted the centre background paper in black to make it stand out.  I added some pearl accents with yellow and white flowers which kept the layout simple but pretty.  


Here is a third layout similar to the first layout above.  This time the banner at the bottom has been layered with banner pieces in different sizes and different papers.   I added some thin white lace across the top of the banner pieces, then added some flower buttons evenly spaced.


Until next time,
have a safe and happy week.
"Light tomorrow with today."  Elizabeth Barrett Browning
HAPPY SCRAPPING!!!!

Tuesday, November 25, 2014

Black Friday Sale at The Scrapping Bug

Black Friday Sale!!

When: Friday Nov.28, and Saturday Nov. 29 ONLY!

What: All 6x6 paper pads - 25% off
  
           All in-store Collection Packs - 20% off

           All Brads and Eyelets - 35% off

           All Fall paper and embellishments - 25% off

           All Halloween paper and embellies - 30% off

           All metal dies - 20% off

           All stamps - 20% off

How: Stop by the store this Friday or Saturday to take part in this awesome sale! If you can't stop by, shop on-line. All these sales apply to our on-line store as well, but no store pick-ups.

We hope to see you this Friday or Saturday!

Wednesday, November 19, 2014

My "OLD AGE" Book

Hello everyone.  I did get my OLD AGE book done, so today I thought I would share it with you.  It was a lot of fun making.  Lots of mixed media, layering, and texturizing using all sorts of products:  cheese cloth, moulding paste, stencils, sprays, inks, netting, etc.  So to start, here is the front cover.  I hope you enjoy.


The first page quote:  To keep the heart unwrinkled, to be hopeful, kindly, cheerful, reverent -
that is to triumph over old age.
Second page quote:  In youth we learn; in age we understand

The third page quote:  Don't worry about wrinkles; they're just antique smiles.
The fourth page quote:  My wild oats have turned into prunes and bran flakes. 
(I had to add in some humour.)

5th page quote:  The best classroom in the world is at the feet of an elderly person.  (How true)
6th page quote:  No wise man ever wished to be younger.

And for the next quote:  You know you are getting old when your pacemaker opens the garage door.  (Some more humour  to help keep you smiling.)
 Next page quote:  I'm not old - I'm a recycled teenager.  (She even has that teenage look.)

The face on the left is one of my favourites (very saucy):  You know you are getting old when the candles cost more than the cake.  
Another favourite picture:  Some people, no matter how old they get, never lose their beauty - they merely move it from their faces into their hearts.  (We will all do the same someday.)


And the last quote (picture on the left):  I'm not old.....I've been young a very long time.
(And another very coy expression)

And there you have it.  I was pleased with the way it turned out.  I keep it on a table in my family room for anyone that wants to look at it and hopefully make their day a happy one.
Thanks for looking.
Until next time, remember
"Over the hill?  I don't remember any hill."

Wednesday, November 12, 2014

Mixed Media Frame

Today I would like to share with you a frame that I did using some simple mixed media techniques to create lots of texture.  The frame I purchased at our local craft store and is about 6 1/2"x 8 1/2".  The background inside the frame is a piece of 5" x 7" canvas board that I got at my local dollar store.  This is a very inexpensive project.
Here is the completed frame.

I wasn't sure what I was going to do at first.  So to start with, I took the canvas board and covered it with a serviette that I had adhering it down with matte gel medium.  I then took a piece of  cheese cloth and covered the complete surface.  You can't really see the cheese cloth in this picture, but it is there.

I then took a stencil from Crafter's Workshop and applied moulding paste onto the cheese cloth.  I did the complete surface with the paste.  This gave it lots of texture which is what I was going for.

I let everything dry completely.  I then misted here and there using Prima's "peony" spray, followed by Prima's soft teal, then here and there with Prima's iris spray, of course drying each colour.  This is how it turned out.  I wasn't sure how the serviette would look but you can see it
 coming through and adding some depth.

For the frame, I painted the surface with white gesso.  I let this dry then I took pieces of tissue paper, wrinkled them up, spread them out slightly (I wanted to keep a lot of wrinkles) and applied them to the surface using matte gel medium.  You can also use matte mod podge if you like. 

 I painted the surface again with gesso to give a good base for the next step.  Using Tim Holtz "bundled sage" distress stain, I went over the surface here and there.  Let it dry, then I went over the surface with "tumbled glass" distress stain.  I did wipe a bit off here and there to let some of the white gesso show through.  I also rubbed on some Inka Gold Metallic Rub, a colour called "haematite" which is a very dark grey blue, onto the raised tissue and around the inside and outside edges.  And for a finishing touch, I placed white dimensional pearls around the entire outside edges.

For the inside of the frame I added a piece of cheesecloth at the bottom left corner.  I painted and added one of my favourite Dusty Attic chipboard vines with some purple roses.   And added some dimensional pearls in and around the vine.   Kept it simple.
The bottom left corner of the frame I added some flowers from my stash, gave it a bit of a punch with the peach coloured flowers.   The purple flowers were painted using Shimmerz paints to get the colour I wanted. Added a loopy bow made from cording as well as a piece of green silk vine that was hidden in my stash.


And there you have it.  Very simple and easy to do.  Thanks for watching.
Until next time,
"Reach for the moon.  If you fall short, you may land on a star."

Tuesday, November 04, 2014

November Happenings


November Happenings!        
            It is hard to believe that it is already November! The year has flown by!  It is going to be a busy month at The Bug, so grab a tea, sit back, and read about all that is happening this month!           


Product of the Month
            When deciding what product to feature for the month of November, we decided that we are featuring something that we have lots of, but need more of! Patterned Paper!!!  That's right! We have 1000's of sheets of patterned paper, and this month for every 5 patterned papers you buy, you will receive 2 cardstock of your choice FREE!  
           Hope you can stop by and browse our selection of patterned paper, I am sure you will find something you just need to have!           


Classes at The Bug !
       
Bev's Copic Colouring Christmas Card Class (FULL)
 
Join Bev Saturday November 8th from 10:30-1:30pm while she shows you some cool techniques in making some fun cards using the Your Next Stamps stamp sets.  Cost: $30.00
 
 
Beginner Copic Class with Janet
 
Join Janet on Monday November 10th from 6-8pm to learn all the ins and outs of copic colouring! We will learn how to shade hair, make gorgeous faces, and colour some flowers!
 
Cost: $15.00    ... snacks included!
 
All registrants will receive 20% off any copic markers purchased.
 
Shadow Box Class with Donna
 
Join Donna on Saturday November 15th and make this gorgeous Graphic 45 Shadow Box using a ton of mixed media techniques! What a beautiful gift this would make!
Cost: $40.00  - just bring some glue!
Time: 10am - 2pm


Heritage Layout with Donna
 
Join Donna on Tuesday November 18th from 6-8pm to learn some techniques while making this gorgeous heritage layout. What a perfect idea to make for a Christmas present.
 
Time: 6-8pm
Cost: $15.00
 
Call the store at 519-895-0554 to register, or email us at orders@thescrappingbug.com


Upcoming Crops        
               
                                      
                     Saturday Nov. 15: 4-11pm
 
                        Friday Nov. 28: 4-10pm
 
                    Saturday Nov. 29: 4-10 pm
 
                    Call the store at 519-895-0554
             to reserve your spot for all crops please.
 
              Cost: $5.00 (includes drinks & snacks)
                We usually order out for dinner too!
 
ALL DAY Christmas CROP ( a couple spots left)
Saturday November 22
10am-11pm
Cost: $40.00
 
Call the store @ 519-895-0554 or email us at 
orders@thescrappingbug.com to reserve your spot.


Looking Forward           
            We have had a lot of new lines in the store, and it seems like there is always more arriving!  Make sure you stop by and check what's new, or stop by our online store and see what is new.
 
Hope to see you all soon!           


We're on Facebook!
To find out when new products arrive and all things happening at The Bug, we're posting it all on Facebook...
We'd love it if you LIKED us! 
Go directly to Facebook here  
To follow us on Pinterest go here 
 
 
Sincerely,
Joanne, Stephanie, and Helen

Friday, October 24, 2014

Silk Flower Tutorial

Hello everyone.   I thought that I would share with you how to make a simple silk flower that you can use on any layout, card, or tag.  


I chose a very light silk fabric for the flower above.  You can use almost any type of fabric - canvas,
 wide silk ribbon, burlap.
To start you will need to cut 8 circles from your fabric.  These will be the petals to the flower. You do not have to be too fussy with trying to get the perfect circle.  Try to keep them the same size and don't worry if your edges are a little uneven.
Punch out a small circle from cardstock which will be your base for the flower.
Now take a circle, place a glue dot in the middle, then fold the bottom up to the top and secure with the glue dot.  Next fold from the left over to the right again securing with a glue dot at the fold.

At this point you can trim off on the curved edge to make the petals a little smaller which is what I did.  Just make sure that you trim all of the petals.

Now take your cardstock circle and cover it with glue dots or two-sided tape.  Take a petal and adhere the point down to the centre of the circle.  Take a second petal and do the same beside the first one.  Do this with two other petals until the circle is covered.

Adhere a large glue dot to the centre of the first petal layer.  Adhere the remaining 4 petals to the centre the same as the first layer making sure that you go over where the petals meet on the first layer.  (in otherwords overlap them)
And there you have a silk flower.  Add what ever you want to the centre of the flower.  I adhered down small white pearls.  You can add a button, another small paper flower, ribbon, or a brad.
And of course, here is a layout I did using my silk flower.


For this layout I used the new Bo Bunny Madeleine collection which is such a pretty line of paper.  The fabric I chose matched perfectly to the colour in the paper.  I added a rezin heart frame from along with some blue flowers which matched the small amount of blue in the fabric.  I took apart a pre-made Prima vine that I had in my stash for some time and added it to the layout.  I also painted the flowers on the vine with a white shimmer paint and highlighted the tips with white gesso.  I added  some of the flowers from the vine to the Dusty Attic chipboard pieces in the upper corner.
Here is a close-up of the silk flower on the layout.

Until next time, to all you
"HAPPY SCRAPPERS"
"It's the little blessings that help us to see just how lovely life can be."

Tuesday, October 21, 2014

October Update at The Scrapping Bug

The Scrapping Bug Update


Saturday October 25th, join us for our first ever Pajama Party!! We are holding an all day crop from 10am - 11pm, and still have a few spots left if you want to come and crop the day away while relaxing in your PJ's!! Lots of games, prizes, food and laughter! Call the store at 519-895-0554 to reserve your spot.

If you can't make it to... our crop, then be sure to stop by the store and check out all our new products.

If you come in your PJ's, you will receive

20% off your entire purchase!

BUT.... you have to have your PJ's on!!

Hope to see you this Saturday!


Classes at The Bug !

There are a few spots left in our upcoming classes....

ADORNit Frame with Donna

 Join Donna on November 1st to make this gorgeous frame using the new ADORNit frames we have in. What a great Christmas gift this would make.
There are still a few spots left, so call 519-895-0554 to register. Cost: $40.00


 The Older Crowd - Copic Card class with Janet

Join Janet as she makes some fun cards using the Art Impression stamps! (examples online soon)
Saturday November 1 from 10am - 1pm. Cost: $30.00

Check out our Calendar for more upcoming classes in November and December!


Upcoming Crops:

Saturday Nov. 15: 4-11pm

Saturday Nov. 29: 4-10 pm


Cost: $5.00 (includes drinks & snacks)

We usually order out for dinner too!

ALL DAY Christmas CROP

Saturday November 22

10am-11pm

Cost: $40.00

Call the store @ 519-895-0554 or email us at
orders@thescrappingbug.com to reserve your spot.


See you soon!

Tuesday, October 14, 2014

A new mixed media layout

Hi everyone, Donna here.  Today, I have another mixed media layout to show you.  This one consists of lots of layering using canvas strips, patterned paper, threads from the canvas, moulding paste, burlap, sprays.  I tried something new using the canvas as I would patterned paper.  Here is the layout.

For the background I used corrugated paper.  I then took a sheet of paper with a wood design on it, cut it down to a 10" square,  tore around the outer edges, heavily inked the edges and adhered it to the centre of the corrugatged paper.  I also took a piece of canvas and cut it into various width strips.  I frayed the edges and kept the pieces of threads.

I then took the strips of canvas and adhered them down in a basket weave style.  One straight down, another one beside it, then one or two across the first two making sure that I varied the lengths of the strips.   I just adhered down randomly.  I then took a piece of patterned paper and cut strips from it and adhered these here and there on top of the canvas.  I did not completely cover the canvas with these paper strips.
Using a stencil I then added textured paste, mainly in the corners, added some drywall tape here and at the outside edges of the wood paper.
Then I took the threads from the canvas and just dropped them onto the layout, spreading them out as I went.

Using various colours of sprays (green, blue, some orange (as there is orange in the shirt) and brown lastly) I sprayed onto the paper here and there.  Onto the corrugated paper I rubbed some rusty coloured kraft paint to highlight it.
Around the picture I cut some scrap pieces of corrugated paper and burlap as shown.  Added a clock sticker and a journaling block at the bottom right corner of the picture.  Did not need to add too much behind the picture as I let the textures on the background paper highlight the picture.  And there you have it.
I hope you enjoy.
Until next time,
here is a little bit of inspiration for all the
HAPPY SCRAPPERS
"When it hurts to look back, and you're scared to look ahead, 
you can look beside you and your best friend will be there"

Thursday, October 02, 2014

October News

It's October!!           
            The leaves are changing colour, there is a crispness in the air, and it is a fantastic month to get some amazing photos of those Thanksgiving feasts, the colours of fall, and those little ghouls and goblins! And of course, you will want to scrapbook those memories.... so grab a coffee, sit back, and read about all the exciting new products and such that we have to offer to get that scrapbooking done!          

We've Been Nominated!!           

A huge Thanks to our customers who nominated us for this years Record Reader Award for Your Favourite Craft Store!!
We are thrilled!!  It's because of our wonderful customers that we have that we strive to provide the best customer service. Thanks to all who will vote for us!       

 Cards for Kids!! 
Just a little update.... A Huge Hug to Tammie White and Shirley Bish as they will be delivering 2 huge boxes of cards to SickKids Hospital in Toronto this coming week, and we want to take this opportunity to give a HUGE THANK YOU to all those wonderful people who have donated some pretty amazing cards!!! The kids will love them! I will update you on the delivery later!
We are going to continue to collect cards for the kids until the end of the year, so please help us out by donating some cards! They can be any theme, just keep the inside blank. These are for the kids to give to their visitors and such.
Our last 2 sessions of card making were a blast, so we have decided that this months cards for Kids session will be
Sunday October 19 from 10am - 4pm!
Stop by and bring your stash to make a card or two for a child to give to someone they love!

GARAGE SALE
            Our Garage Sale was a huge success and we want to thank everyone who participated by bringing in their sale items and for those of you who waited in line to shop!  Watch for a spring cleaning garage sale in the spring!

Classes at The Bug this month!

Christmas Copic Card class with Bev
Join Bev on October 18 from 10:30 - 1:30 to make 6 gorgeous Christmas Cards using new Whipper Snapper Stamps and the new Wink of Stella brushes!  Both are so great to work with!  Check out her cards online in the Calendar or at the store.
There are still a few spots left, so call 519-895-0554 to register or to put a hold on the stamps and Wink of Stella brushes!

The Older Crowd - Copic Card class with Janet

Join Janet as she makes some fun cards using the Art Impression stamps!  (examples online soon)
Saturday October 11 from 1-4.

October Crops        
                    Saturday Oct. 4: 4-11pm
                     Friday Oct. 10: 5-10 pm
                    Saturday Oct. 18: 4-11pm          
              Cost: $5.00 (includes drinks & snacks)
        

ALL DAY PJ CROP
Saturday October 25th
10am-11pm
Wear your PJ's for a fun filled day of scrapping and playing!
Call the store @ 519-895-0554 or email us at  orders @thescrappingbug.com to reserve your spot.

New This Month!!       
It has been non-stop this week with new products arriving in the store daily!! It's awesome!!
 New in the store this past week has been:
Carta Bella - All Bundled Up
Authentique - Spirited, Grateful, and Classique: Pretty
My Favourite Things - numerous Dies and stamp sets
Echo Park - Designer Dies and Stamps (cute Christmas ones!)
Echo Park - Home for the Holidays and Christmas Cheer
Pebbles - Home for Christmas
Crate Paper - Maggie Holmes - Open Book
Dusty Attic - gorgeous chipboards
ADORNit - 4 new paper lines and decorative frames
Ranger - Dylusions - stamp sets, Wendy Vecchi Embossing
                  Powders, Tim Holtz Distress  Stain Spray                        

I think that's all.... I may have forgotten a thing or two, but do stop by and check out all the goodies soon!!
    

Looking Forward          
            There are still lots of boxes of new product to be arriving this month...
Doodlebug Design: Frosty Friends and Happy Camper
Graphic 45 - Raining Cats & Dogs
Petaloo - Flowers and such
Heidi Swapp - September Skies
Pink Paislee - Bella Rouge
American Crafts - Amy Tangerine - Stitched
Bella Blvd - Hello Autumn, Tiny Tots, Halloween Magic, and Christmas Cheer
Needless to say.. it is a busy time at The Bug. Products will be on our online store soon after they arrive at the store.

Wednesday, October 01, 2014

The Art of "OLD AGE"

Hello everyone!!  Today I would like to share with you one of the most heart-warming and delightful Art Journaling/Mixed Media books that I have seen.  It was designed by Helen the manager at the Scrapping Bug store and I was totally delighted when she gave me permission to show it to you.  This book totally tickled my heart and I find it to be one of the most creative mixed media items that I have seen in a while.
The book is titled "Old Age".


Here are a few of the pages.  The quotes are equally delightful and suit each picture perfectly.

The quote:
"Old age is the most unexpected of all the things that can happen to a man."

The left side picture quote:
"The great secret that all old people share is that you really haven't changed in seventy or eighty years.  Your body changes, but you don't change at all.  And that, of course, causes great confusion."

The one on the right is one of my favourites.  The face and the quote puts a smile on my face.
"Some people, no matter how old they get, never lose their beauty 
- they merely move it from their faces into their hearts."


The left side "The secret of a good old age is simply an honourable pact with solitude."
And the right side picture
"I pray to see another day."


"Sing out loud" says it all for this picture.  Simply delightful.


The picture and quote on the left really made my day.
"There's one advantage to being 102.......there's no peer pressure."

Even though I'm not 102 yet, there is nothing further from the truth.

And finally the picture on the right, again makes for a chuckle.
"With mirth and laughter let old wrinkles come."

I hope you enjoyed this posting and I especially hope that it brought laughter to your heart and a smile on your face.  I plan on making an "Old Age" book for myself - to sit on my coffee table and to look at when I want to brighten my day.
Until next time,
"In my next life, I'm going to have more memory installed."
Thanks, Helen, for your creativity and insight.