I hope everyone is enjoying this absolutely beautiful day. Where I live it is currently about 75 degrees and I can see all my perennials popping up.
As promised, today I am posting 3 of the pages that I have completed for my Beautiful Faces album. I will mention that I haven't decided on my quotes for each page. That will be done at a later date.
Page #1
For the background I tore pieces off of pages from a very old book and randomly adhered them down onto patterned paper. I also cut strips of another patterned paper and added them. When done I painted a very light coat of gesso to blend the papers together. Next I took a piece of cheesecloth and adhered it down from the upper left corner of the page down to the lower right corner. Some Prima tea stain spray here and there was next.
I cut thin strips of papers and made a basket weave piece to go behind the picture and coming out from the left side of the picture. I added lace across the bottom of the picture, flowers with a piece of cheesecloth under the larger ones, and metal embellishments to finish it off. I selected metal pieces that complimented the jewellery.
I also added some tiny glass beads around the picture and embellishments and some pearls.
Below is a closeup.
Page 2
For this page I did some stenciling with a stencil that has very tiny holes. I then whitewashed gesso very lightly onto the left side of the page then sprayed with a very light pink spray.
I added my picture to a piece of paper and had the paper just come out from the upper left corner of the picture. I added a doilie then placed my picture using pop dots.
I embossed a decorative flourish and added this to the left side of the picture. A couple of metal embellishments were next with some flowers added as shown.
A closeup is below.
Third Page
I tore off the right edge of the background paper, inked the edges then adhered a strip of lace down the torn edge. I adhered the strip that I tore off next beside the lace then added another strip of the paper at the outside edge.
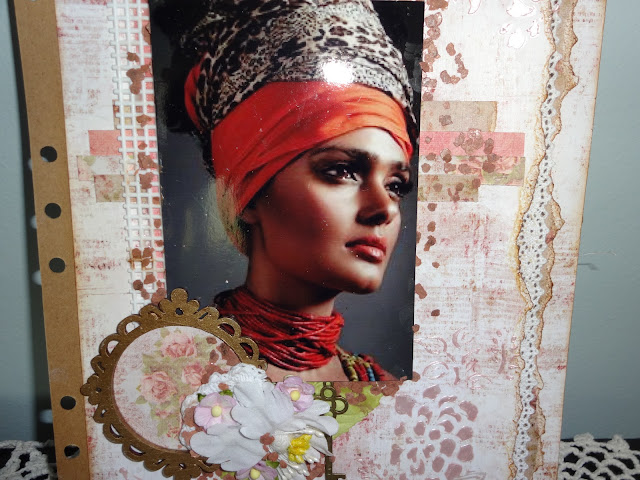
I cut strips of patterned paper as I did on page 1 and made a basket weave piece to go behind the picture. I used pop dots to adhere the picture down. The white strip you see at the left side of the picture is actually the base used for needle point work. Lastly, I added the ornate circle frame with a few flowers and paper leaves as well as a small metal key. Around the picture I added some mica flakes for accent and put more on and around the flowers.
And there you have it for now. More will be coming.
Until next time, this is Donna wishing you a safe and properous week.
Remember,
"Anyone who keeps the ability to see beauty, never grows old."
"Happy Scrapping"


No comments:
Post a Comment