Thursday, February 27, 2014

12 x 12 Mixed Media Canvas

Hello everyone.  I am leaving on vacation in a couple of days to the "sunny" and "WARM" parts of Mexico, so I thought I would share a quick view of a canvas that I did using some mixed media products that I love to use.  Below is a canvas that I did.  I did not put a picture on it as I wanted you to see the textures.

I am currently working on another 12 x 12 canvas.  I want to share with you the application of some of the textures that I used for the background.
First off you will need products that will give you lots of texture.  I used tissue paper, mesh, muslin, doilies moulding paste, matte mod podge, gesso and off course colours of mists and sprays.  Gather up flowers, metal items, buttons, chipboard items - anything from your stash.   They do not have to be white, in fact, they can be any colour you like.  These will be your embellishments.

To start I placed some mod podge in a section then added one of my texture products on top.  Then I added more mod podge onto the surface of the item.  Below is a section of the canvas that I have started to show you how the texture starts to take shape.  I plan on adding lace to different parts of the canvas.

You can see the mesh, tissue, doilie, muslin and modeling paste.  You can overlap items and keep adding items until you have the desired build up.


When you have finished, let it dry completely.  You will then paint the whole surface with white gesso.  Let dry completely.  This will allow the mists and sprays to adhere properly.
Now for the fun part.  Place your embellishment items onto the canvas where you would like.  When you are happy adhere them down using a hot glue gun.  When finished with a paint brush paint all the items with white gesso.  Now you can do your spraying starting with the lightest colour first.  Just spray here and there at the start.  Let each colour dry completely before spraying the next one.  Below is a close-up of the bottom left corner and the upper right corner of the canvas.  
You can accent your flower colours using a kraft paint that matches.


I hope you enjoy.  Until next time, 
HAPPY SCRAPPING!!!!!!

Tuesday, February 25, 2014

Bo Bunny now available in store and online!

Check out the new lines we've received from Bo Bunny!!
Now available in store and online :)


Shop online here...STORE
 

Thursday, February 20, 2014

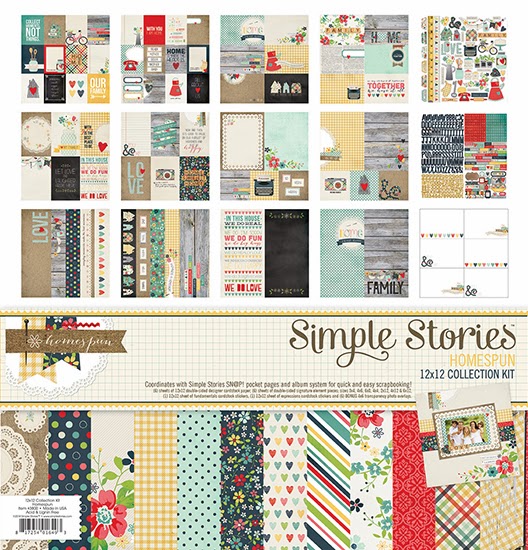
Simple Stories "Homespun" now available in store and online!!

Check it out...another great collection by Simple Stories!!   It's here and already selling fast so be sure to get in too see how nice it is in person :)


With a new set of insta-cards available for the Sn@p line of products...perfect for those instagram photos!!


Tuesday, February 18, 2014

Quick and Easy Sketch

Hello everyone!!  I am back with another quick and easy sketch that you can complete
in a short amount of time.

Below is a layout that I did using the sketch but adding more paper strips.  

I selected papers from the My Minds Eye Cut and Paste collection, 4 different patterns.  I always like to use  a variety of patterns on my layouts.  First I selected my first background paper (striped).  I then cut down my next paper to an 11" square.  After inking the outside edges I took a border stamp and stamped around the outside edges of this paper.  I then adhered it to the centre of the striped paper.  Then I did some stamping, here and there with a word stamp and a border stamp with dots.   I also took a honeycomb stencil and inked it in various places.  There was no set pattern for this, I just went with what I felt like.  I did try to keep it away from the middle of the page so that it would be around the picture.  This just gave the background a little more texture.
From another piece of the striped paper I cut a piece 5" wide x 7" long and adhered this to the page next, as shown.  I then placed my picture in the centre of the page without gluing down.  I cut strips from the papers I selected, some 1 1/2" wide and some 1" wide.  Most  on the left side of the picture were about 4" long.  The ones under the picture were about 8" long.    Next I simply started placing my strips of paper (without gluing for now) around the picture and tucking them under the picture.  I overlapped the strips and varied the lengths.  When I was happy with my placement I adhered them down.   At this point you can adhere down your picture.  I used pop dots on my picture to give it a 3D look.   I then cut some more strips for the flags and placed them at the bottom right corner of the picture and larger ones coming out from the bottom left corner of the page.  I also added some punched scalloped circles with a fifth paper as shown on the layout.  This just added another shape to the layout instead of all straight lines.   And the rest is as you would like.  I added buttons here and there, some metal gears and tiny circles here and there, as well as some loose weave burlap ribbon under the picture and on top of the corner flags.  And for another texture I added some clear glossy accents (Tim Holtz) on top of the small dots created by my honeycomb stencil (upper right corner and at the top left corner of the picture).  Below is a close-up of the bottom right corner of the layout.

Have some fun, get creative.  Until next time, this is Donna wishing you a great day and some
HAPPY SCRAPPING!!!!!

Wednesday, February 12, 2014

New Products have arrived!

Be sure to watch us on Facebook and here on our blog to see everything that will be coming in over the next two to three weeks!!! It's going to be crazy around here!!
 
From Echo Park and Carta Bella!!


From Technique Tuesday...dies and stamps by Ali Edwards!!


Be sure to stop by soon....we expect these to sell really fast!!


Monday, February 10, 2014

"Pretty In Pink"

I thought I would share a layout with you that I did recently.  I used the Basic Grey "True Love" papers which worked perfectly with my picture.  To get the effect I like I used 4 papers for my background.

  To start with I selected a darker pink for the main background paper.  I then chose a lighter pink paper, cut it down to an 11" square, distressed the edges and inked them and centered it onto the main paper. I then cut a cream coloured cardstock paper down to a 10 1/2" square, inked the edges,  and added that to the centre of the light pink.  My next paper was the flowered one that I cut down to a 10" square, distressed the edges and inked them, and leaving the upper left and bottom right corners unglued, 
 I centred it onto the cream cardstock. I then rolled the corners over and added a strip of lace just under them along with some pearls on the rolled section.  
To the centre of the flowered paper I adhered an 8" paper doilie. 
 Here is a close-up shot of the embellishments I added to the left side of the layout.  I layered die cut hearts and flowers above the main pink flower which I made from left over paper.  The white hearts are chipboard from Heidi Swapp.  Behind the main pink flower I added some green leaves to pull in the colour of the green vine at the top of the page, along with white fibre that I found in a craft store in the knitting department.  Behind the picture I decided to add a light pink and darker pink piece of paper by slanting them outwards from the picture.

Below the picture I added some pink silk ribbon which I ruffled by sewing a long running stitch down the centre of a long strip of ribbon.  I gathered it up by pulling the end of the thread until it was the length I needed.    I also punched a strip of cream cardstock  with a row of white pearls at the top to go behind the ribbon for an extra accent.  
A green silk vine across the top of the layout and a large flower and heart at the upper right corner completes the layout. .  Below is a close-up of the bottom right corner and the ruffled ribbon.

I hope you enjoy.
HAPPY VALENTINE'S DAY
AND
HAPPY SCRAPPING!!!!!

Thursday, February 06, 2014

New Authentique Products!

Well, let the good times begin with all the new and great products that are on the way.  To start, we've received some new Authentique recently that are now available in store and online!
 
Travel

Baby

Easter

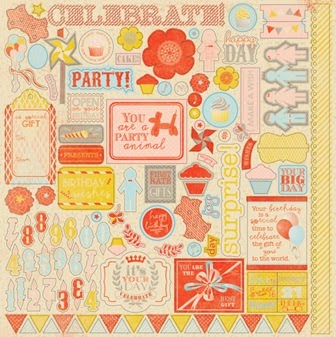
Birthday