Hello everyone!!! I hope you are having a great day.
My next project has begun. Back in 2015 I made an album called "Old Age". You can find it in the 2015 archives on the right hand side of the blog. I have decided to make another album called "Beautiful Faces". It is turning out to be an extensive project and it will be a lot of mixed media techniques with pictures of beautiful faces from around the world.
Today I will be showing you the front cover of the album.
I haven't decided how to complete the back and spine. I may cover it with canvas just to keep it simple. As I finish a couple of pages, I will show you how I completed them. So this will be a section by section posting until I have finished the complete album.
Next are the basic steps to completing the cover.
I first painted the entire surface with white gesso for protection. I then did some mixed media techniques to give the background lots of texture.
First I took a product called "string gel" and mixed some fine ground shiny material that I found at Micheal's called Decorative Filler. The string gel is thick and dries very hard and firm. I let this dry.
I then added some netting that I have had for some time just in a few places. And lastly, I used a stencil with dots and applied some modeling paste here and there. I also put modeling paste in several places using a spatula only. Let all of this dry completely.
I then painted the whole surface with black gesso.
I then dry brushed various colours of Finnibair's Art Alchemy paints onto the surface. I didn't completely cover the surface with any of the colours. I dry brushed them on here and there, even slightly going over the first one. I mainly used rich turquoise, and light patena. When the paints were dry I sprayed first with Prima tea stain spray, let it dry, then came back with a shimmerz turquoise spray. You have to judge for yourself how you want this to look. It is all a matter of layering your colours. You can always go back and add colours, which is exactly what I did when I had completed the cover.
The next step is my favourite. Selecting and adhering the embellishments. I pulled out lots of items from my metal collection. I did keep adding other pieces as I went.
Below is how it looked before I painted everything in black gesso.
As you can see above that I layered everything and made sure that every item was touching another one. I started at the upper right corner with the metal corner piece and went out from there. Its okay to put some things on top of others. I did add some paper flowers here and there but mostly I used metal items. To adhere them down I used Art Basics (Finnibair) Heavy Matte Gel. This is amazing as a glue. Nothing will fall off when you use this. A lot of the items you see are used for making jewelry. Just go for it. You can't make too many mistakes.
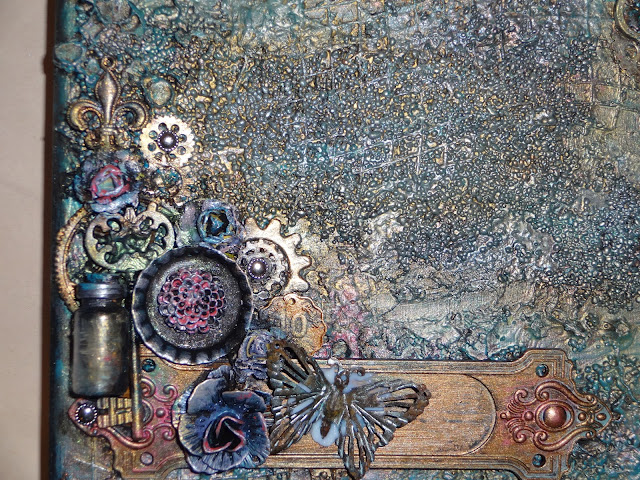
When all my embellishments were added I then painted them with black gesso. From there I used several colours of the Art Alchemy paint - the blues, pinks, brass, even red. I just dry-brushed them on here and there. I also dusted on some mica powder in a few sections. You get a better result if you let each colour dry first and just keep adding more. Below is a couple of closeups to show you the final result.
There you have it. The start of a new album which will be on my table in my family room along with my old age book. This is something I have been planning for some time. I will keep you posted on its completion.
Until next time, this is Donna again wishing you a safe and prosperous week.
HAPPY CRAFTING
"Happiness is when what you think, what you say, and what you do are in harmony."
Ghandi


