Thursday, February 20, 2014

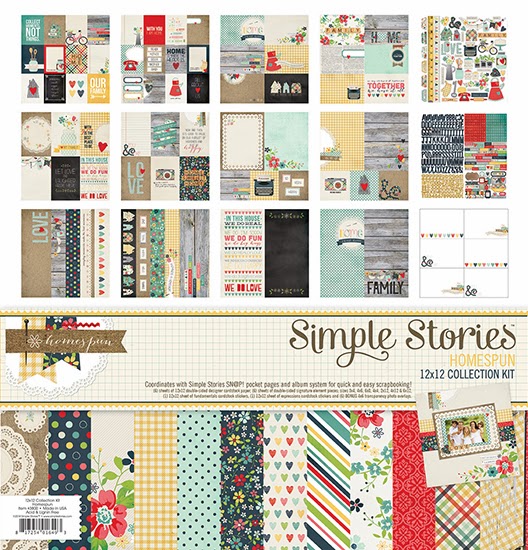
Simple Stories "Homespun" now available in store and online!!

Check it out...another great collection by Simple Stories!!   It's here and already selling fast so be sure to get in too see how nice it is in person :)


With a new set of insta-cards available for the Sn@p line of products...perfect for those instagram photos!!


Tuesday, February 18, 2014

Quick and Easy Sketch

Hello everyone!!  I am back with another quick and easy sketch that you can complete
in a short amount of time.

Below is a layout that I did using the sketch but adding more paper strips.  

I selected papers from the My Minds Eye Cut and Paste collection, 4 different patterns.  I always like to use  a variety of patterns on my layouts.  First I selected my first background paper (striped).  I then cut down my next paper to an 11" square.  After inking the outside edges I took a border stamp and stamped around the outside edges of this paper.  I then adhered it to the centre of the striped paper.  Then I did some stamping, here and there with a word stamp and a border stamp with dots.   I also took a honeycomb stencil and inked it in various places.  There was no set pattern for this, I just went with what I felt like.  I did try to keep it away from the middle of the page so that it would be around the picture.  This just gave the background a little more texture.
From another piece of the striped paper I cut a piece 5" wide x 7" long and adhered this to the page next, as shown.  I then placed my picture in the centre of the page without gluing down.  I cut strips from the papers I selected, some 1 1/2" wide and some 1" wide.  Most  on the left side of the picture were about 4" long.  The ones under the picture were about 8" long.    Next I simply started placing my strips of paper (without gluing for now) around the picture and tucking them under the picture.  I overlapped the strips and varied the lengths.  When I was happy with my placement I adhered them down.   At this point you can adhere down your picture.  I used pop dots on my picture to give it a 3D look.   I then cut some more strips for the flags and placed them at the bottom right corner of the picture and larger ones coming out from the bottom left corner of the page.  I also added some punched scalloped circles with a fifth paper as shown on the layout.  This just added another shape to the layout instead of all straight lines.   And the rest is as you would like.  I added buttons here and there, some metal gears and tiny circles here and there, as well as some loose weave burlap ribbon under the picture and on top of the corner flags.  And for another texture I added some clear glossy accents (Tim Holtz) on top of the small dots created by my honeycomb stencil (upper right corner and at the top left corner of the picture).  Below is a close-up of the bottom right corner of the layout.

Have some fun, get creative.  Until next time, this is Donna wishing you a great day and some
HAPPY SCRAPPING!!!!!

Wednesday, February 12, 2014

New Products have arrived!

Be sure to watch us on Facebook and here on our blog to see everything that will be coming in over the next two to three weeks!!! It's going to be crazy around here!!
 
From Echo Park and Carta Bella!!


From Technique Tuesday...dies and stamps by Ali Edwards!!


Be sure to stop by soon....we expect these to sell really fast!!


Monday, February 10, 2014

"Pretty In Pink"

I thought I would share a layout with you that I did recently.  I used the Basic Grey "True Love" papers which worked perfectly with my picture.  To get the effect I like I used 4 papers for my background.

  To start with I selected a darker pink for the main background paper.  I then chose a lighter pink paper, cut it down to an 11" square, distressed the edges and inked them and centered it onto the main paper. I then cut a cream coloured cardstock paper down to a 10 1/2" square, inked the edges,  and added that to the centre of the light pink.  My next paper was the flowered one that I cut down to a 10" square, distressed the edges and inked them, and leaving the upper left and bottom right corners unglued, 
 I centred it onto the cream cardstock. I then rolled the corners over and added a strip of lace just under them along with some pearls on the rolled section.  
To the centre of the flowered paper I adhered an 8" paper doilie. 
 Here is a close-up shot of the embellishments I added to the left side of the layout.  I layered die cut hearts and flowers above the main pink flower which I made from left over paper.  The white hearts are chipboard from Heidi Swapp.  Behind the main pink flower I added some green leaves to pull in the colour of the green vine at the top of the page, along with white fibre that I found in a craft store in the knitting department.  Behind the picture I decided to add a light pink and darker pink piece of paper by slanting them outwards from the picture.

Below the picture I added some pink silk ribbon which I ruffled by sewing a long running stitch down the centre of a long strip of ribbon.  I gathered it up by pulling the end of the thread until it was the length I needed.    I also punched a strip of cream cardstock  with a row of white pearls at the top to go behind the ribbon for an extra accent.  
A green silk vine across the top of the layout and a large flower and heart at the upper right corner completes the layout. .  Below is a close-up of the bottom right corner and the ruffled ribbon.

I hope you enjoy.
HAPPY VALENTINE'S DAY
AND
HAPPY SCRAPPING!!!!!

Thursday, February 06, 2014

New Authentique Products!

Well, let the good times begin with all the new and great products that are on the way.  To start, we've received some new Authentique recently that are now available in store and online!
 
Travel

Baby

Easter

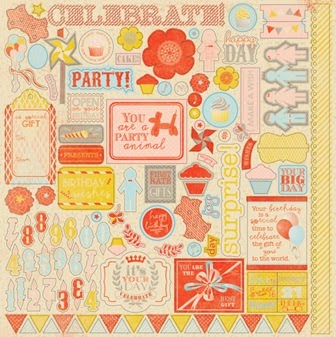
Birthday


Wednesday, January 29, 2014

Create Your Own Album Cover

Hello again.  Some time ago I came across a way to make your own album cover.  So I tried it myself and here is the result.  I found it easy to do and you can make any size you like.  This is my finished cover.
To get started, you will need the following items:  patterned paper (2 sheets co-ordinating paper to cover the inside of the cover), chipboard, duck tape, ribbon or lace, embellishments and products of your choice for the front cover.  Below are a few of the items I used for my album cover for the background:   tissue, cheesecloth, matte mod podge, moulding paste and a brick wall stencil.
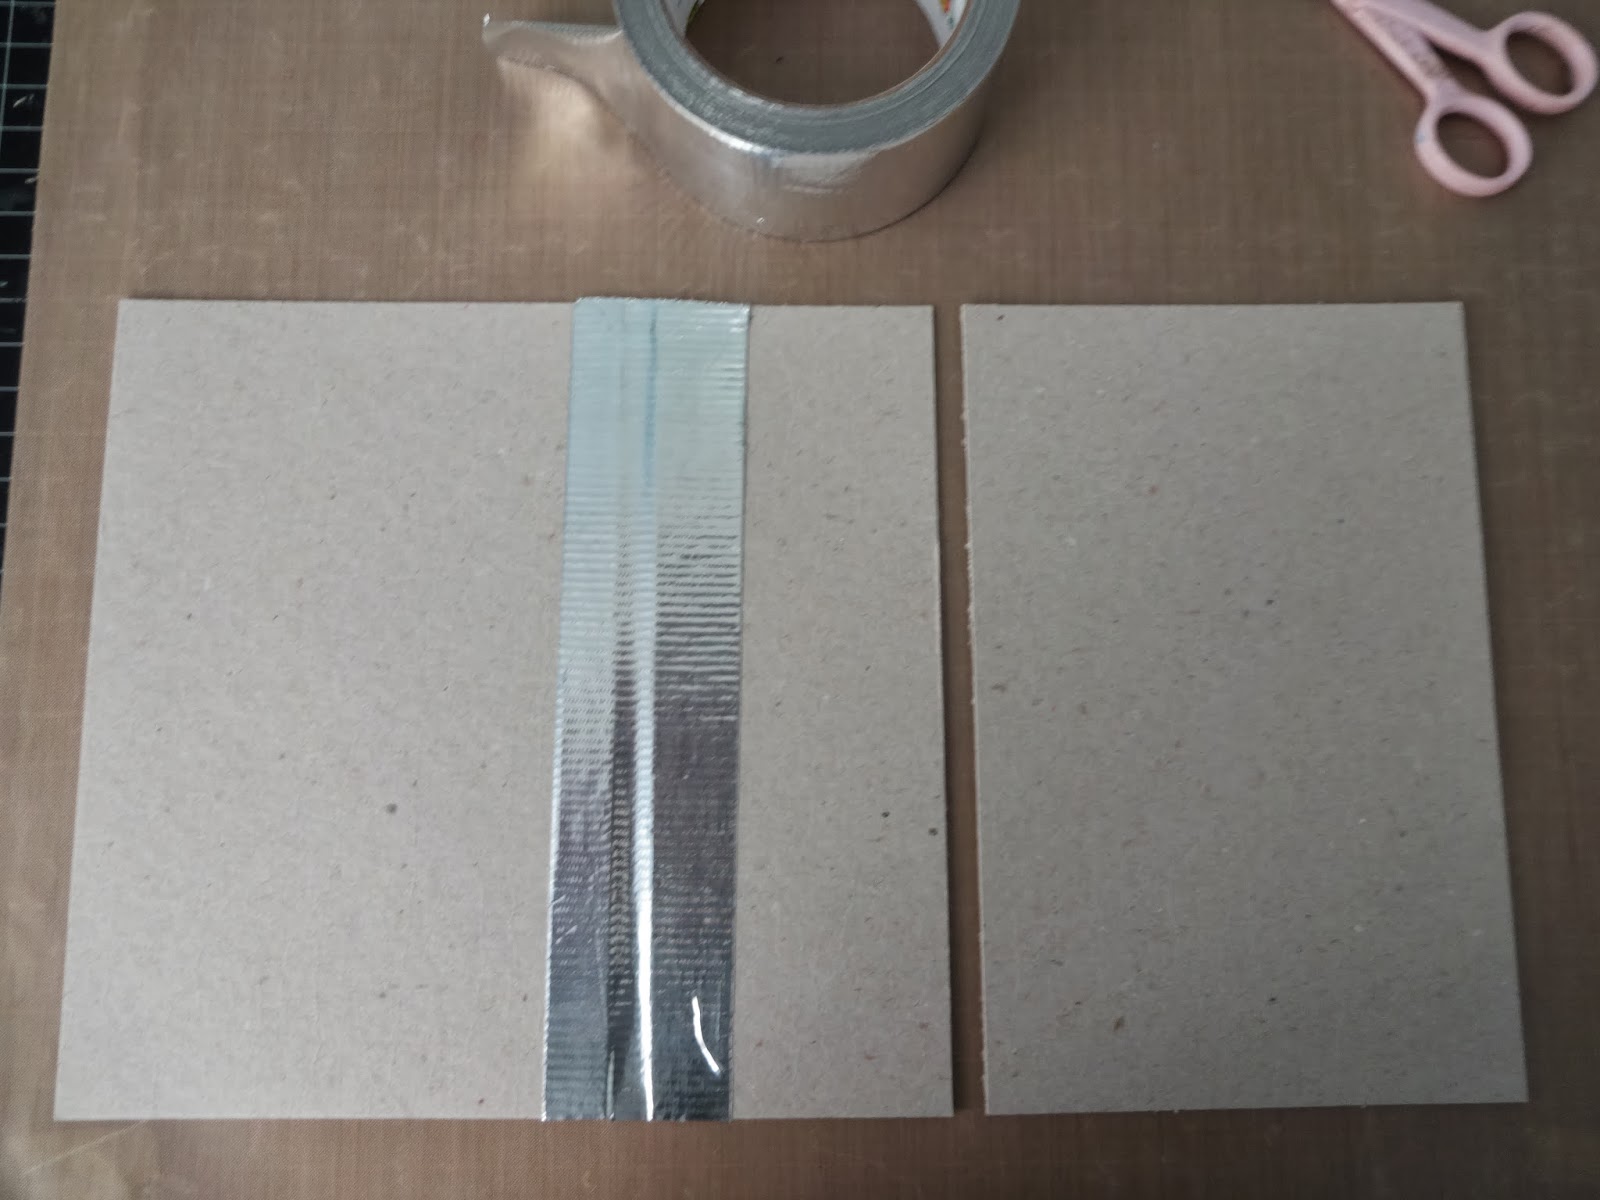
To start cut two pieces of chipboard to the size that you want your album.  Mine is 8 1/2" long x 5 1/2" wide. Then you will cut a third piece the same length x 1 1/2".  This will be the spine.  You can cut the spine larger if you want, it just depends on how full an album you want.

Lay your pieces of chipboard on your table.  Place the spine between the two main ones having it about 1/4" apart.  Keeping it steady cut and apply a strip of the duck tape down the space between 
the pieces on both sides.
Now you will take more duck tape and completely cover the spine.  You will do the duck tape on both sides of the covers.  The space between the spine and the covers is to that you can fold the covers.
This is what it will look like completely covered.


Now you will cut 3 strips of ribbon, whatever width you want, (I used a 3/8" gro grain ribbon).  The length should be about 3 times the length of your spine and add a little bit for good luck.  Take these strips and using a very tacky ribbon glue (I used the 3 in 1 glue) adhere the strips to the spine evenly spaced making sure that the part coming off the bottom of the spine is slightly longer that the top of the strips.  Cover the strips using another piece of the duck tape.  These strips of ribbon have a specific purpose which you will see at the end.   PS.  You can use any colour of duck tape that you want.  You can even buy it now with patterns on it.

Next, cut pieces of your chosen patterned paper to cover the front and back covers as well as a separate strip for the spine.  You should use a very tacky glue to adhere the paper to the duck tape.


Now you can continue and decorate the covers with what ever you want.  I first took a piece of tissue paper, wrinkled it up in a ball to get lots of wrinkles.  I decided to have it going across the centre of the front cover on a diagonal and a portion of it I placed onto the spine.   Place some matte mod podge onto the covers in the area that you want to place the tissue.  Place another coat of the mod podge onto the tissue to seal it.  I then took a piece of cheese cloth and adhered it the same as the tissue across the bottom of the front cover and just going over the edge of the tissue.  Using a brick wall stencil, I decided to apply some modeling paste at the upper left corner of the front cover slightly going over the edge of the tissue.  Because the tissue and the cheesecloth is white I decided to apply some light purple gelatos to give it some colour.
Now you are ready to finish the cover.  Here is a close-up of what I added to mine.  Behind the flowers is a piece of cheese cloth - which I applied loosely by only gluing at the centre.  I wanted it to be"fluffy" around the flowers.  I added my flowers, some die cut vines, metal brads  (I cut the backs off ) and lace.  Some small light purple pearls scattered here and there finished it off.

Now for the strips of ribbon.  For the inner pages you can cut pieces of various papers making sure that you cut them 2 times the width of the covers, minus 1/2" which will ensure that the inside pages will not extend beyond the covers.  Have the length about 1/2" shorter than the covers.  To show you the centre pages I cut some different colours of cardstock - some are different widths, however you can cut them all the same size.  You can use patterned paper if you wish or a combination of both.  Put your pages together and fold them in half.  Take the first ribbon strip and wrap around the pages at the centre fold.  Tie a double knot or a bow at the top.  Cut more pieces of paper the same for the second and third ribbon strips.  You will end up with 3 sections for your album.   You can secure the ribbon if you wish when you have all your pages inserted. Below is the first section sample.  Now complete your pages with pictures and embellishements.

I hope you enjoy.  I can't wait to get started on a full 12 x 12 album cover.  Remember the "sky is the limit".  Have fun!!! Until next time 
HAPPY SCRAPPING!!!!!


Monday, January 20, 2014

MIXED MEDIA LAYOUT

This is Donna here sharing another layout idea with you - this time I did a mixed media background.  I only used one sheet of patterned paper for the background.  I love mixed media because you can find so many things in your house, at the dollar store or just in your stash to create very textured backgrounds.  Here is the layout.  Unfortunately my camera was giving me a bit of trouble and the colours did not come out too good.


For the background I used a piece of patterned paper from my stash, a circle doilie, a square doilie, mesh, drywall tape (yes that is what I used), gesso,  matte mod podge and 3 colours of mists or sprays.  I added other items as I went.


To start I placed a fair amount of the mod podge onto the patterned paper.  I then placed the large circle doilie at the centre onto the mod podge, sticking it down.  I then took more mod podge and applied it to the entire surface of the doilie.  I used this same process for the rest of the medium items.  Next I took the square doilie and cut off the decorative corners.  I placed them at the corners of the patterned paper.  I then took the dry wall mesh and cut off strips which I placed randomly onto the paper.  You can go over the doilies, just stick it down.  Next I took some squares of this mesh that I found at a fabric store and adhered these down as well.  Below you can see how the texture from these products is taking shape.  I decided to place some twine completely around the outer edge making loops here and there.  Let this dry completely.

At this point I decided to also add some lace across the bottom edge and across the upper edge of the page as well as some modeling paste using Tim Holtz honeycomb stencil. I used the paste in three areas.   See how you can keep adding things.  I like to layer lots of  items to get lots of texture.

I decided on the size of my picture and placed a piece of paper where I wanted the picture to go.  I then went to my stash and pulled out all kinds of items - flowers, leaves, metal embellishments: butterfly, music notes, circle items, etc. - anything I could get my hands on.  Mostly one item things.  I then placed them around the picture as shown below.  I may not use all the items and I may add some or move things around, however, this is what I came up with at the time.


Now I took all these items and placed them onto a piece of paper in the same manner as I did above.  Nothing worse then forgetting where you wanted to place an item.

 I did some spraying using green, pink and blue mists onto the background. Always start with your lightest colour first.  It is very important that you let each spray colour dry before using the next one.   I started with the green and only sprayed in  a few areas.  I then sprayed with pink.  As pink is my main colour for the layout I pretty much sprayed everywhere.  Even slightly on top of the green.  Then I used the blue very lightly here and there.  
When my background was completely dry I began adhering the embellishments using a hot glue gun.  The glue gun is great for adhering as it holds really well.  But it dries very fast, so be sure you have the item in the right place.  I did change some things and added others as I went. More flowers and leaves.   When you have adhered all your embellishments,  here is where the gesso comes in.  I took a flat-edged paint brush and completely painted all the embellishments with the gesso.  Some of the metal items I had to put two coats on.   Let dry completely.  You can use a heat gun or a hair dryer to dry faster.   You can see at the top of the picture below where I sprayed first before adding the embellishments.

Using the same sprays, begin spraying the embellishments lightly at first.   You can always add more colour after.  Dry between each colour (very important) as you do not want pooling which can make for a muddy colour.  Here are some close-up pictures of sections of the embellishments after spraying.


And there you have it.  Remember mixed media is all about using whatever you want.  I like it because I can use up a lot of "stuff" that I  didn't know what to do with.   Search out your local dollar store - I have found lots of "stuff" there.   It is fun and you never know what you will end up with.   I hope you enjoyed.  Until next time
HAPPY SCRAPPING!!!!!!!

Friday, January 17, 2014

New products starting to arrive this month!!

We've been receiving lots of calls, emails and texts from everyone waiting very patiently for me to put together this long list of product lines we'll be getting in over the next 2 to 3 months.  Please be aware that the dates we're posting here are estimates and not guaranteed.  Also, in order to keep the list less cluttered I've included the names of the lines, it doesn't mean we've ordered every product from each line.
 
We'll post when new products arrive here on our blog and facebook page :)
 
Bo Bunny:  Baby Bump, Happy Tails, Modern Miss, Primrose (late February)
 
Websters Pages: Sprinkled with Love, Hello World, Our Travels (Late February)
 
Hazel & Ruby: NEW Supplier!! Stencil Masks & Washi Tape (February)
 
Adornit: Timberland Critters, Summertime Memories, Happy  Trails, Wisteria, Dog, Snowman
(Please note: these are new releases once a month so we only receive these complete lines one at a time between now and November. This applies to Adornit only)
 
Doodlebug: Springtime, Sugar Shoppe, Hip Hip Hooray (late February)
 
Little B: NEW Supplier! Dies, Washi Tape, Various theme stickers.
 
Jillibean Soup: Birthday Bisque, Sightseeing Stew, Spicy Social Soup, Stamps & Stencils, various Embellishments (late February)
 
Chic Tags: NEW Supplier! Cloud 9 and Let's Go (late February)
 
Avery Elle: NEW Supplier! Variety of stamps and dies (February)
 
Simple Stories: Homespun, DIY Boutique, Fresh Air, Summer Paradise, Hey Mom, Hey Dad, New Sn@p sets, and theme cards (February & March)
 
Carta Bella: It's a Celebration, Sew Lovely, Baby Mine (January, February, and March)
 
Echo Park: All new lines between now and March
(Getaway, Splendid Sunshine, Summer Bliss, Summer Adventure, Goal, Day at the Zoo, Grad, Boys Rule, My Life, That's my Boy, Hippity Hoppity, St. Patrick's Day)
 
Technique Tuesday: Various stamps and dies (February/March)
 
Memorybox: Various new dies (end of January)

Ranger: Various new Tim Holtz/Dina Wakely/Dyan Reavely products
 
American Crafts has acquired new companies over the last 6 months and we've ordered from all of them...to keep the list short here are the various companies you can look forward to seeing products from::
American Crafts
Crate Paper
Amy Tan
Dear Lizzy
Imaginisce
Studio Calico
Heidi Swapp
Pink Paislee
Pebbles Inc.
 
The list does keep longer as we keep submitting orders...more to come from Graphic 45, Ranger, My Minds Eye, and others :)
 

Sunday, January 12, 2014

Organza Ribbon Flower

Hello everyone!!!!!  I am going to share with you a very simple organza ribbon flower technique.  This is one of my fav's.  You can sit by the TV and make a bunch of these for use later on - on most anything. 
Here is a layout I did using this flower.

 All you need is organza ribbon, needle and thread and a punched circle to match the colour of your ribbon.  I used a 1" wide ribbon.  You can use any width.  The wider, the larger your flower.

Measure out a strip of ribbon about 36" long.  The longer your strip, the fuller your flower. You want to stitch a long running stitch along one straight edge of your ribbon.

Do not tie off the thread just yet when you get to the end.  Now using a hot glue gun (works faster and holds firmly)  you will adhere the ribbon to the punched circle starting at the outside edge.  You will make the ruffles as you go by pulling the thread.  Apply a small amount of the glue then press the ribbon onto the glue.  Keep going until you have completely gone around the outside of the circle.

Now place some glue below the stitched edge of the first layer. Continue pulling the thread to make ruffles and adhere the ribbon around until you get to the centre.  Secure in place at the centre. 


Now you can add something to the centre of the flower.   The one on the layout has a single white pearl.  The one for the tutorial I added white cording and placed a large glitter button at the centre.  You can add almost anything.  And there you have it - very easy and fast.

Here is a closeup of the flower on the layout. 

Really, you can use any ribbon - doesn't have to be organza.  I plan on making more and use different mediums to add to the flower.  Oh, yes I will share these with you soon.  Until then
HAPPY SCRAPPING!!!!!

Monday, January 06, 2014

New classes are now posted!

We're off to a roaring start here at the Bug!! We're looking forward to hosting more classes and crops this year than ever before so hopefully everyone is feeling crafty and excited to learn new techniques!!  Creating gorgeous projects, layouts, and cards is a great way to ignite your creativity!  Check out what's coming up this month at the BUG!!


Saturday January 18th @ 1:00pm
Join Janet to make 6 cards using the Uptown Girls stamps by Stamping Bella!  A great class to get back to colouring with Copics.
Cost: $30/$27 (members price)
 
  
 Tuesday January 21st @ 6:30pm
OR
Saturday February 8th @ 10:30am
Join Donna to create this one page layout that will be a perfect tribute to those wintery Christmas pictures you have.  Using lots of techniques including gesso, mesh, and mists, this is a great way to jumpstart your creative flow.
Cost:  $18 / $16 (member price)
 
 
Saturday Jan 25th @ 10:30am
Join Anna to create this wood veneer album into something genius! Using lots of DIY embellishments, mists, masks, and ink, this album will definitely be a great way to have fun getting messy :)
Cost: $30 / $27 (member price)
 
 Contact us soon for your spot in these great classes.  Check out our calendar for all the supply lists and more pictures.
519-895-0554
orders@thescrappingbug.com

Saturday, January 04, 2014

Ruffled Layout

Hello everyone!!!!! Happy New Year!!!!  I created a new layout featuring a ruffled paper border and would like to share with you how I did the layout and the ruffle around the circle.  First the layout.
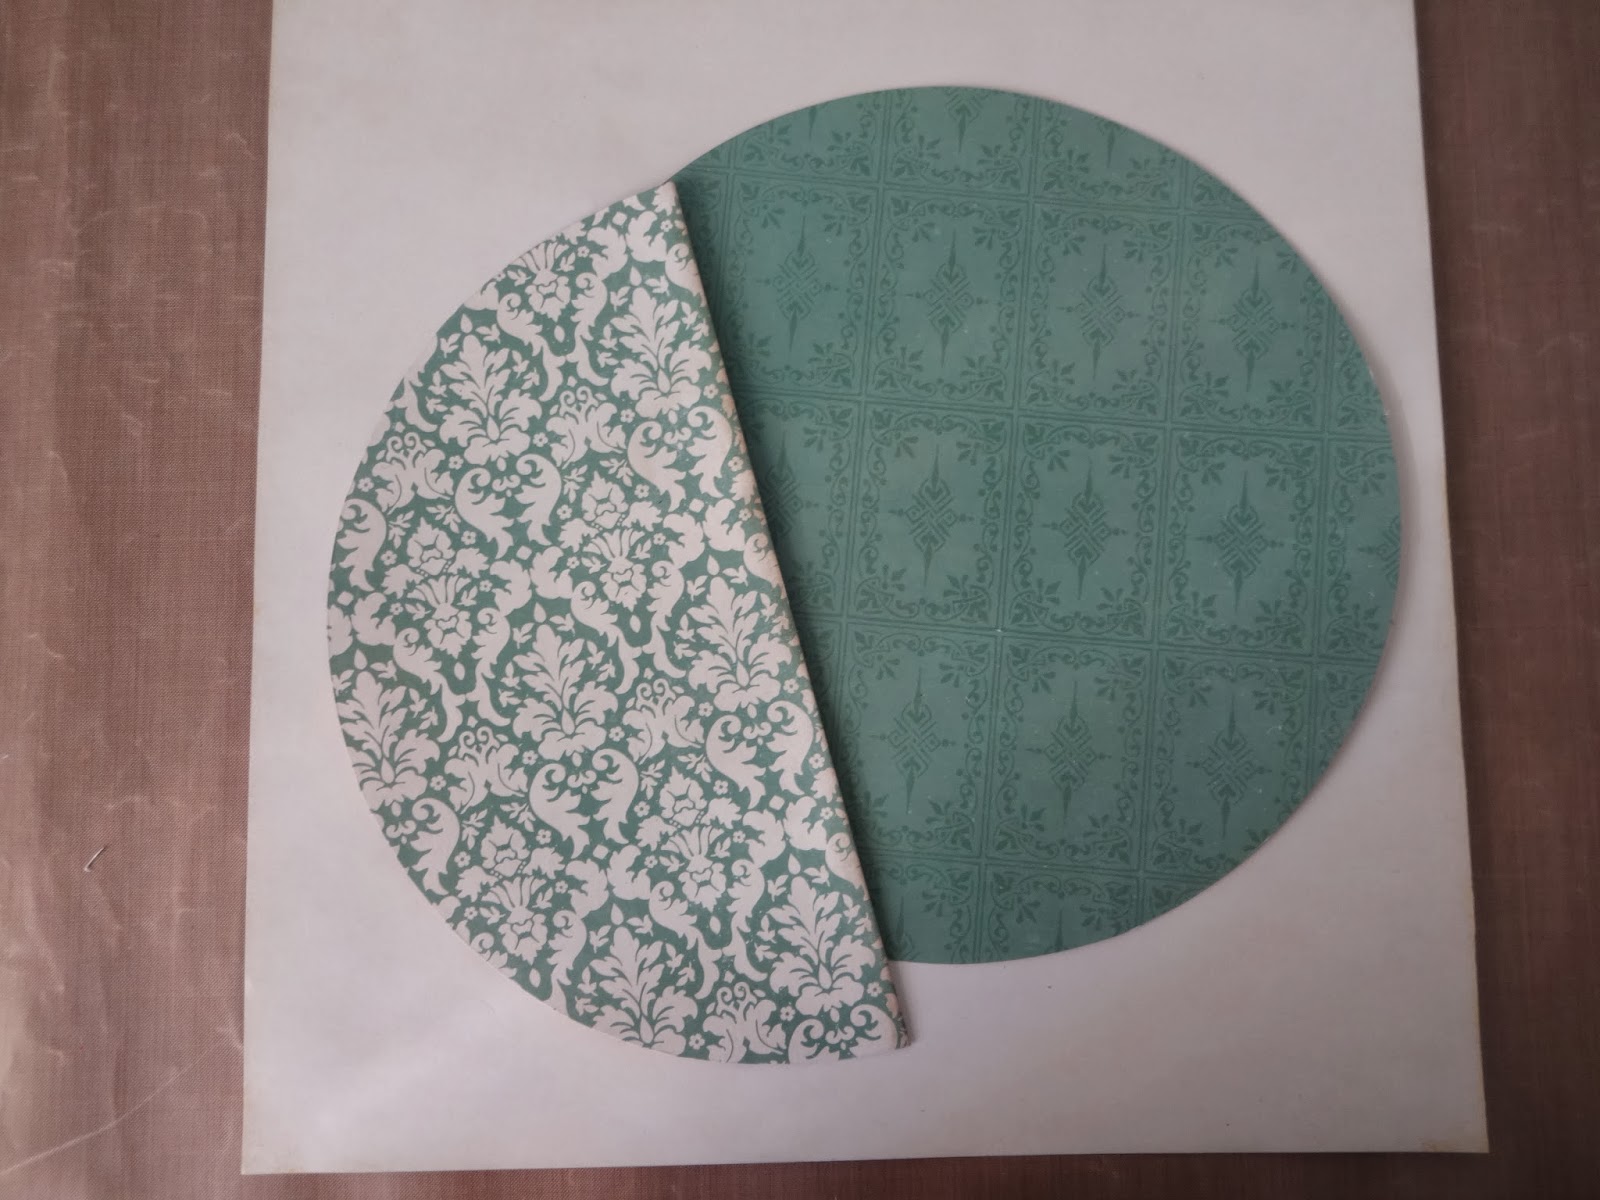
To start I chose my paper that I wanted for the circle.  I used paper from the Echo Park Lori Whitaker "Reflections" line.  I cut out a 9" circle from the paper (the green).  I kept the paper after the circle was cut for use later on.   I then cut a half circle from the outside edge of the second paper I selected (paisley).  Measure from the edge toward the centre of the paper (4 1/2"), mark it, then trace the half of the large circle.  Cut it out using scissors.   I cut it from the side edge as I will need the balance of the paper for the ruffles.  I adhered the half circle to the left side of the full circle.


For the ruffle I cut four 1 1/2" strips from the balance of the paisley paper.  Using a border punch (I selected a lattice punch) I punched each strip.  I used the other side of the paisley paper for the ruffle.  I did ink the edges of the strips along the lattice edge.

Mist each of the strips with water to soften the paper.  Do not soak the paper as it will tear.  Now gently fold up the strips as shown below and let dry.  Only takes a few minutes.

Now turn your circle over to the wrong side.  Take each of the ruffled strips and lay along the outer edge of the circle making sure that you spread out the strips where necessary to fit around the entire circle.  Adhere in place.  Turn the circle over to the right side and there you have your ruffled edge.

To complete the balance of the layout, I took the piece of paper left over from cutting out the full circle and cut this down to an 11" square.  Using a distressing tool, I distressed  and inked the edges.  I adhered this to the background paper, centering.  I then took another full sheet of paper with a different pattern and cut it down to a 10 1/2" square.  I distressed  and inked the edges and then adhered it to the centre of the green paper.  This will cover the hole from the circle.  (I like to use up as much of my paper as possible.)
I added my circle to the page.  I then adhered some decorative cording around the entire edge of the circle to finish it off.  The addition of die cut vines and small yellow flowers (yellow is my favourite accent colour for green) and an organza bow with white twine  and small flower at the centre, finishes off the layout.   With the ruffles you do not need to have too many extras added.  You can keep it simple and let the ruffles be your main feature.  I did add a white chipboard circle frame around the picture which I think sets the picture off nicely.  A decorative metal oval added and there you have it.  You can make a ruffled border for any area of your layout.
I hope you enjoy!!!!  Until next time
HAPPY SCRAPPING!!!!!