Thursday, July 30, 2015

Special Message

Good morning everyone.  This is an update for everyone to let you know that we are hard at work countin inventory and updating product in our on-line store.  We hope to be completed most of the updating very soon.  Our on-line store is currently still open and you can still place orders.  We know that you will be pleased with our future plans for the Scrapping Bug.  Lots of new products, lots of new layout kits, plans for all-day crops, etc. are in the coming months.  We will keep everyone up to date here on our blog.

Now I would like to share with you a project that I completed that will make a very nice gift for that special person.  At my local dollar store I found several wood gift boxes that were very inexpensive.  I purchased the one below because of its shape.


First, I painted the entire surface of the box inside and out with a cream coloured kraft paint to give it a protective seal but also so that no bare wood  will show.
I then took crackle paste from Prima and applied it all over the top of the lid and the base of the box.  Using my heat gun, I dried the crackle paste.  I then took an acrylic stamp and stamped randomly with black staz-on ink to give more texture.  I then took one of my favourite stencils and moulding paste and applied the paste just at the ends of the lid as well as around the base of the box.  Using a paint brush I very lightly brushed on some Prima Colour Bloom sprays in glistening waves and sorbet, using the sorbet first, then the glistening waves then came back very lightly with watered-down tangerine.  I used a brush rather  than direct spraying as I wanted to control how much and where I put the sprays.  Make sure that you play with your colours on a scrap piece of paper to get the combination that you want.  I only wanted a bit of contrasting colours mainly around the outer edges of the box lid  I also went over the stencilled areas.  You can add one of the colours to the rim of the lid and the base.
This next step I found to be worthwhile to give the box extra protection.  There is a product that you can get from most craft stores called Decopauge.  Some of you may be familiar with it.  It is a clear liquid that dries quickly to a gloss finish.  Simply apply it with a flat paint brush making sure that you don't go back and forth and keep your brush strokes going the same way.  This will protect the box from any finger prints or water damage and give it a nice finish.  All I had to do next was my embellishements.  Below is a picture of the top of the lid.

For some reason ,this year, I am liking the peach colours.  I find it very refreshing and colourful.   I placed a picture of a fairy into a small white resin frame and adhered it at the centre.  I used a hot glue gun for all my items for a stronger hold.  I placed the flowers around the frame along with some small tiles, a loopy bow from fine cording and some pearl drops that I found in the wedding dept. at Michaels's.  And finally around the outer edges of the lid and the lid rim, I placed dots of dimensional pearls in a peach colour.  Then I added some items to the front of the box base as you can see above.


I hope you enjoyed this latest project.  Until next time,

"HAPPY SCRAPPING"
                 from Donna
"If I'm not at the mall at least twice a week, they send me a Get Well Soon card"

Monday, July 06, 2015

9 x 12 Canvas

Today I thought I would share with you a couple of canvases.  They are 9" x 12" which is my favourite size to use.  I used some mixed media techniques on both and have included some closeups of sections of the canvases.

The background for this one, above,  was created using various sprays, stamps and stencils.  I backed the frame in the centre with pieces of paper and then added them using pop dots.   I had a quote block in my stash which I adhered to the back of the frame in the centre.  You could also add a picture.   I added some glitter at the bottom right corner and at the side of the flowers at the upper left corner.  I also inked the sides with a brown ink to define the edges.  I made the large flowers using paper doilies.  A picture tutorial is at the end of this blog on how I made them. Very easy.
A couple of closeups


For the next canvas I used the same technique with the sprays for the background.  I did place a thick coat of heavy gesso using a spatula onto the canvas first which gave it more texture.  Using moulding paste and a word stencil, I added this to the background.


I cut strips of various patterned papers, tore the ends on a slant, then layered them .  I also used some honeycomb chipboard pieces which I embossed first with white embossing powder.  After I completed the entire canvas, I added some dimensional pearls to the honeycomb chipboard.  The centre decorative piece is   embossed  with white embossing powder.  I cut out the flowers in the centre from a patterned paper and adhered it to the back of the frame.  I also layered some papers behind the frame and used pop dots to adhere to the canvas.  Added my flowers as shown making sure that they were in the same colours as the sprays that I used.
A couple of closeups


Doilie flower tutorial:  First you will need a doilie.  I used a 5" doilie for my flowers.
Fold the doilie in half and crease so that you get the centre.

Next, unfold the doilie and pinch the centre of the doilie with your fingers, which you see below.
Holding the pinched point turn it upright and carefully begin adjusting and fluffing the doilie to create ruffles and to get it how you would like.  If you want you can add some glue at the centre, but I found it was not necessary.  I then took some glimmery paint (two colours) and painted the centre of the flower.  When this was dry I added and adhered another small paper rose to the centre.  And there you have it.  I will mention when I adhered it to my project I nipped off the pinched point on the bottom first so it laid flatter.  I knew once it was adhered down the flower would not come apart.


And there you have it.  I hope you enjoyed.  Please give the doilie flower technique a try.  I bet you will find yourself making lots of them.
Until next time
"Scrapbooking is so much cheaper than a psychiatrist."


Tuesday, June 09, 2015

Hello everyone.  Today I thought I would share with you a couple of layouts I did a few weeks at my favourite scrapbooking retreat - Memories Manor.  
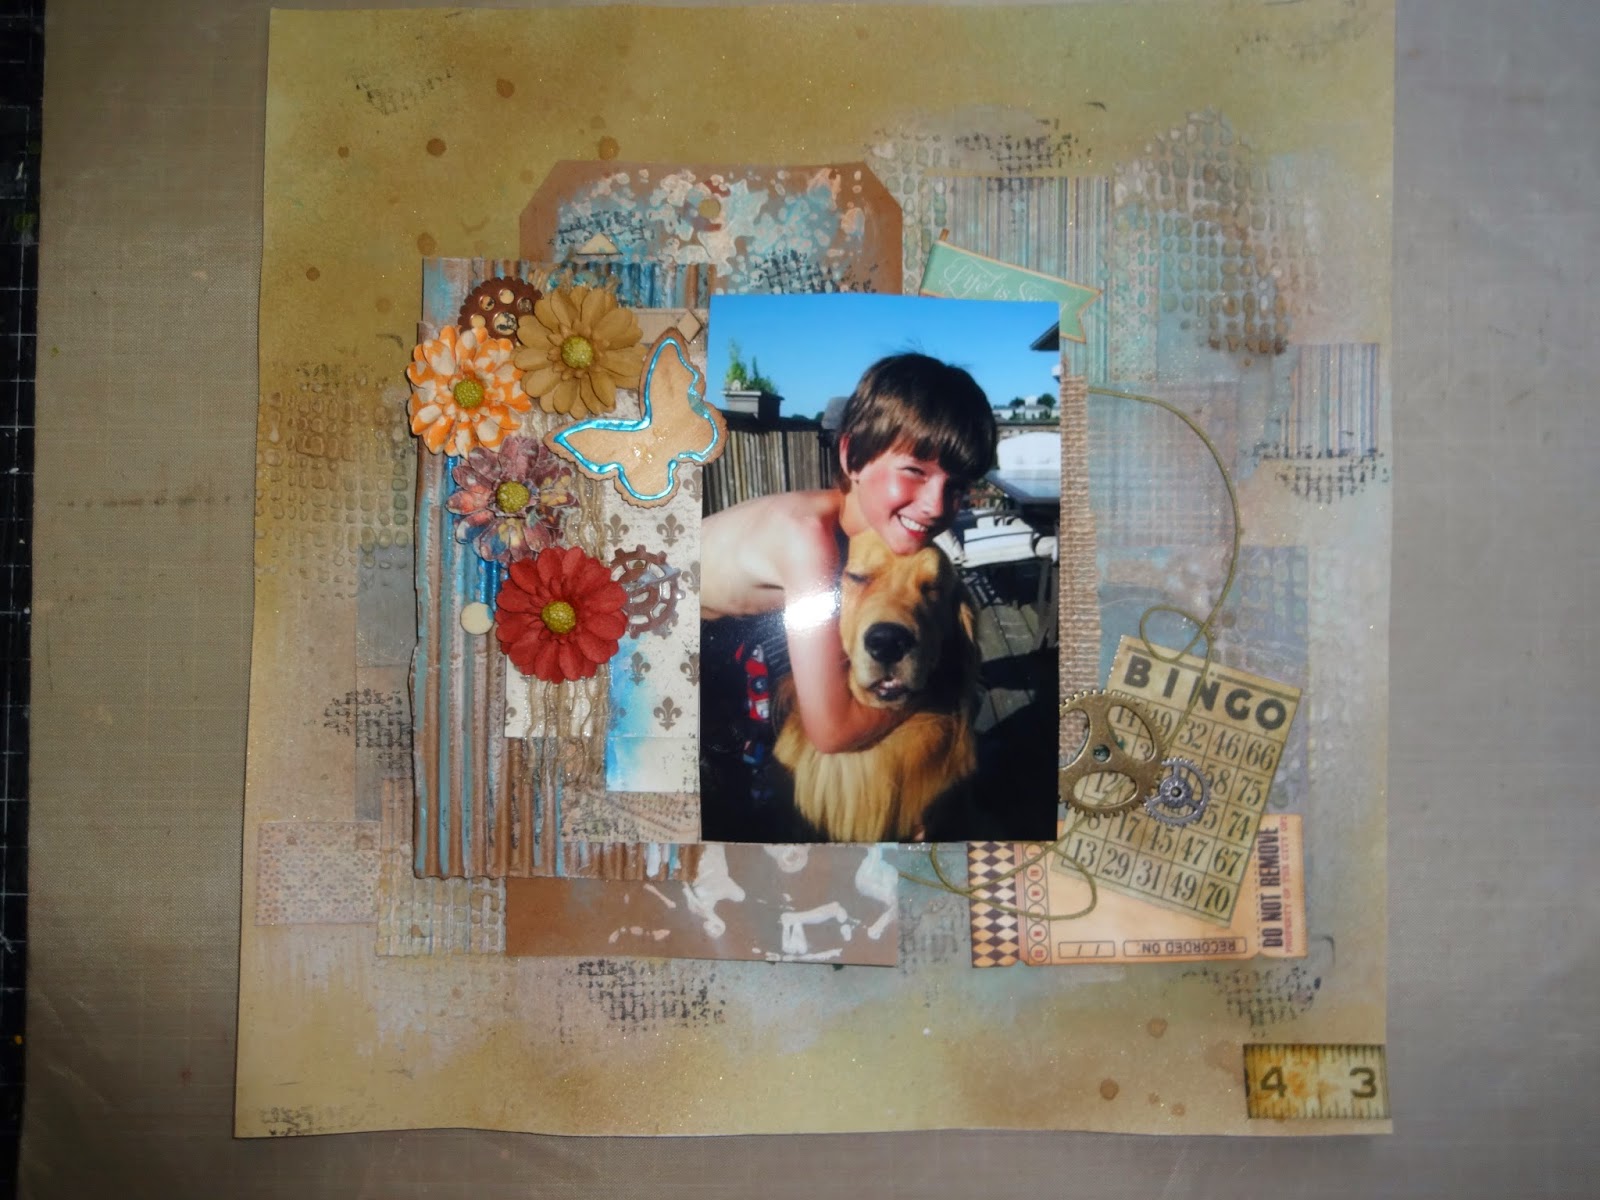
The first one is more of a rustic look.  I have a 12 x 12 stencil with diamond shapes on it.  So I placed it onto my paper and stencilled Shimerz textured paste onto the paper but only around the outside edges.  I cut strips of various papers and adhered them down the left side overlapping them and giving them different lengths.  I added some tags at the left as well.  The white mesh that you see accenting the layout is actually the mesh that you use for needlepoint.  I cut some pieces off and used them as an accent.  It worked quite well.

Here is a closeup which shows you the diamond stencil pattern.

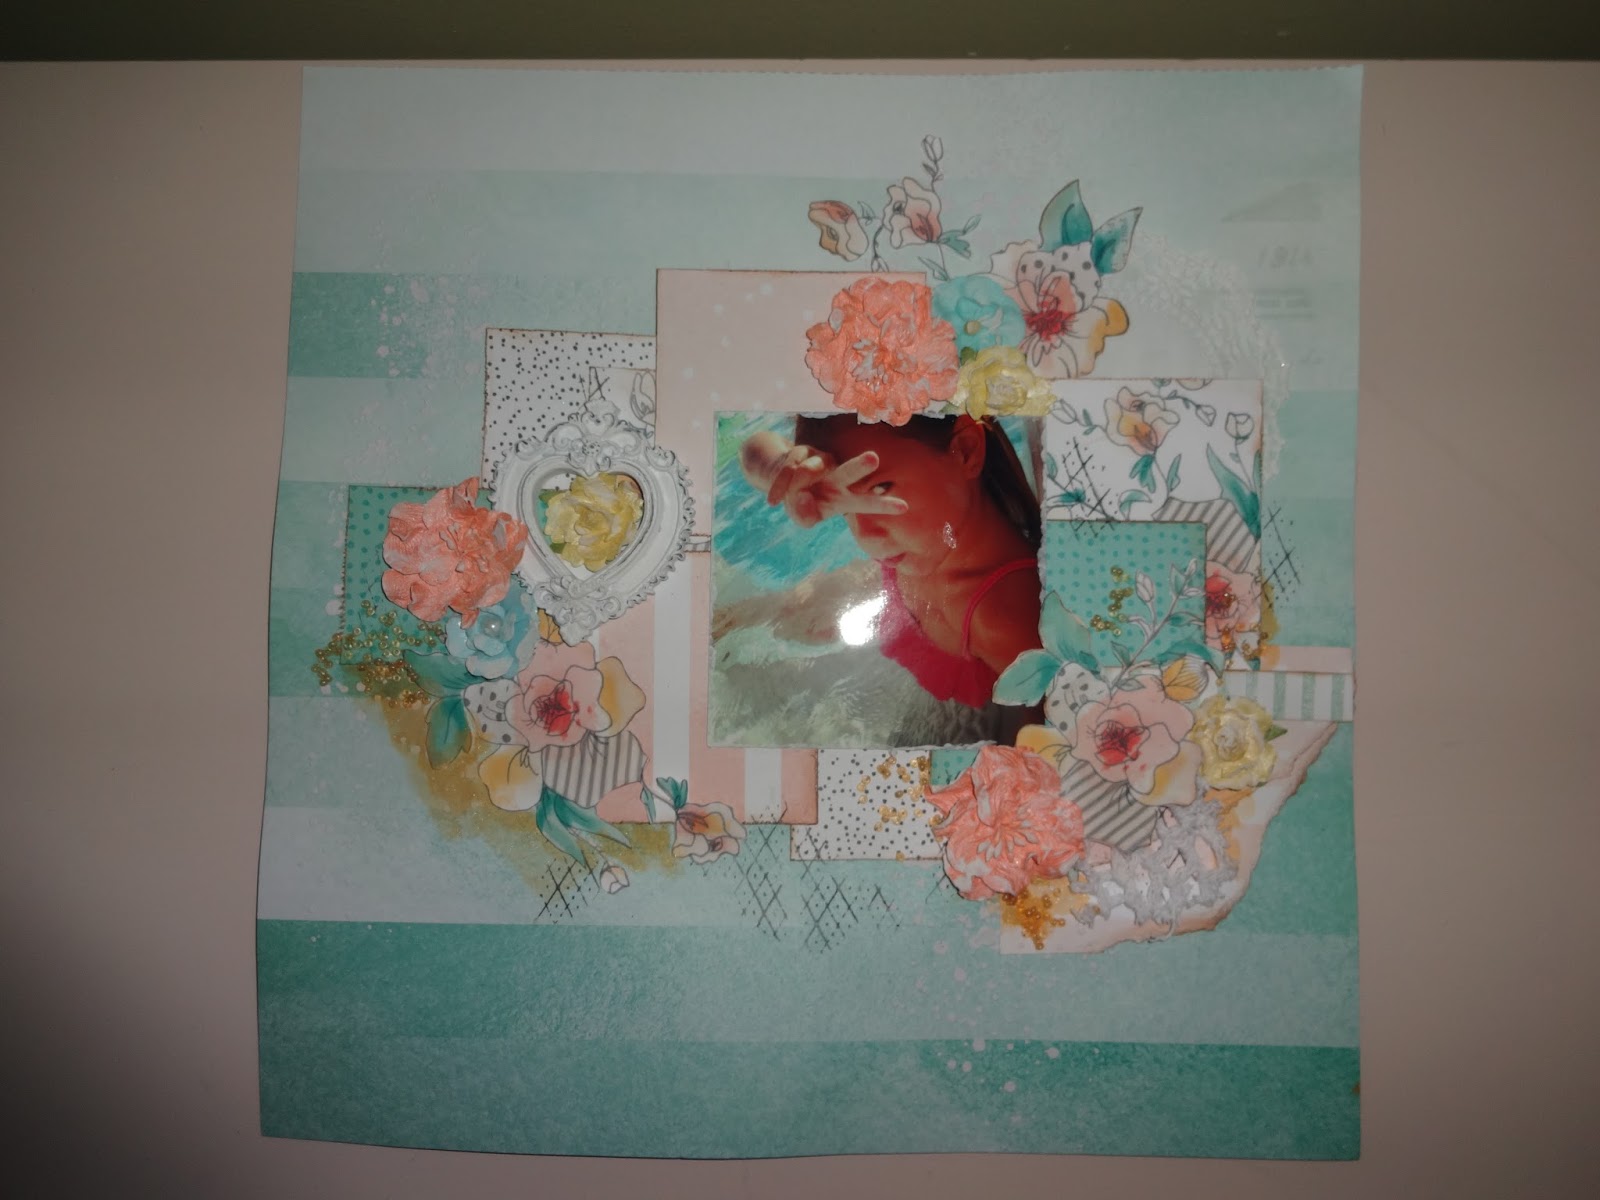
The second layout is a summery layout.  I fussy cut the flowers that you see  from a patterned paper.  If I find a piece of  flowered patterned paper in my stash I quite often cut out the flowers
 and put them away for future use.
I used a stencil that looked like bubbles and applied white moulding paste on the outside areas.  I cut and layered other papers for behind the photo which I raised up with pop dots.  Did a bit of stamping with a stamp and black ink around the layout.    Added my flowers and a resin frame.  And there you have it.  When I was completely done the layout I took a stiff brush and brushed extra thick white gesso onto the edges of the flowers.  This helps to blend the flowers together.

A close up of one of the fussy cut flowers.
The bit of white material tucked under the bottom of the fussy cut flower was cut from a doilie to give a little more accent.


Enjoy.  Until next time,
"HAPPINESS IS CREATING"
AND REMEMBER:
"A perfect summer day is when the sun is shining, the breeze is blowing, the birds are singing, 
and the lawn mower is broken."

Saturday, May 16, 2015

Hello everyone!!!!  I have a few new layouts for you to take a peek at.  I decided to try making a tag which is something I rarely do - in fact I have not made one in many years.  I saw some tags that other people had made and decided to use up some left over items from a layout that I had done.   I enjoyed making it but did not know what I was going to use it for.  So I ended up making another layout and adding the tag to it.  I really surprised myself.   Here is the tag and the layout.

I did do some stencilling with moulding paste on the page first and a bit of spraying for more texture.  The tag completed the page and I did not need to add too many more items on the page. 
  
Here are a couple more layouts I did.  The first one is a heritage layout which I did in a class at the store.  I decided to share it with you.  

And this last one is another mixed media layout.  Lots of texture with a stencil and moulding paste.  I then painted the squares from the stencil in different colours using watercolour paints.  I accented the squares here and there with a black journaling pen.  


I do hope you enjoy these layouts.  Until next time,
remember
"HAPPINESS IS CREATING"

"The best kind of friend is the one you could sit on a porch with, never saying a word, 
and walk away feeling like that was the best conversation you've had."


Thursday, April 30, 2015

This weekend marks National Scrapbooking and we want to invite you to come celebrate the day with huge savings in the store, and on-line!

Stop by the store anytime on Saturday May 2nd, from 10am - 10pm to grab some great deals store-wide!

Here is a little sample of what we have on sale this Saturday...

ALL Christmas and Halloween papers and embellishments 30% off.

ALL Echo Park papers and embellishments 30% off.

ALL Fancy Pants papers and embellishments 30% off.

ALL Take & Make Kits 30% off. 

ALL Dies and Stamps 30% off.

ALSO... For every $50.00 you spend in the store, or on-line before taxes, you can enter your name in a draw for a $30.00 store gift certificate!

This sale applies to our on-line shoppers as well. You must order Saturday between 10am EST and 10PM EST for this sale to apply to your order.

Hope to see you Saturday and enjoy a great weekend of scrapping those awesome memories!


Wednesday, April 22, 2015

May Updates at The Scrapping Bug

Spring has finally arrived, and we have lots of things happening in the next few weeks at The Scrapping Bug, so grab a coffee, and read on!

New Products

Our DHL friend has been busy delivery boxes of goodies to the store this past week... finally!  Here is a list of all the goodies so far...

We R Memory Keepers - Albums, Fuse Tools, Page Inserts

Crate Paper - Confetti papers and embellishments

Crate Paper - Craft Market embellishments and some papers

American Crafts - Shimelle - all papers and tons of embellishments

Bazzill - Kraft paper with gold foil and New MYLAR papers too!

Pink Paislee - Atlas and Citrus Bliss papers and embellishments

Pebbles - Homegrown papers and embellishments

Amy Tangerine - Embellishments... paper to still arrive

Crate Paper - Journey collection

Jen Hadfield - Cottage Living collection

Dina Wakley's new paint colours, as well as some new stencils from Tim Holtz.

I am sure I am missing a few things, but we hope you stop by the store to see all this goodness for yourself!

National Scrapbook Day - May 2nd     
Join us for a day of fun and laughter as we hold an all day crop in honour of National Scrapbooking Day!
Join us from 10:00 am until 11:00 pm to crop the day away!
This includes lunch, dinner, snacks throughout the day, goodie bags, games and so much more!

Cost $40.00
Call the store 519-895-0554, to register!

May Crops
       
            Friday May 8 : 5pm-10pm

            Saturday May 16: 4pm - 11pm  
    
            Friday May 22: 5pm - 10pm

          *Saturday May 30: 4pm - 11pm
          * Note: This crop is a pot luck crop.. call the store to
                      find out what you need to bring!       

All crops cost $5.00, and include snacks! We usually order out for dinner if you want to join us, or bring your own.

Call the store at 519-895-0554 to register... t]our crops fill up fast, so don't delay!  Or email us at  orders@thescrappingbug.com to register also.

May Classes          
            We have a busy, busy month with classes!! You can check out our calendar at Our Calendar to see what we have too!

Mixed Media Class with Donna
Saturday May 9th from 10:30 am - 3:30pm.
Join Donna for a day of learning all about mixed media while creating a gorgeous 11 x 13" canvas. 
Mixed Media is all about personal taste... if you want a different color than what is shown, please do not hesitate to bring your own colors of ink sprays and we can help you with this.
Cost: $45.00
Note: Bring your lunch, snacks will be provided.

Altered Card Class with Janet
Wednesday May 13th from 6:00 - 8:00pm
If you're looking to make some cards and you're not into colouring, this is the class for you! Join Janet for an evening and create 6 assorted all occasion cards!
Cost: $30.00

Copic Class with Bev
Saturday May 16th from 10:30am - 1:30 pm
Join Bev in creating some cards using Copic Markers and House Mouse stamps.  Check the calendar for images of the class soon!
Cost: $30.00

Copic Class with Janet
Saturday May 23rd from 12:30pm - 3:30pm
Join Janet to create 6 gorgeous cards using copic markers and Uptown Girl stamps.
Cost: $30.00


Zentangle Class with Brenda
Sunday May 24th from 1pm - 4pm
Join Brenda Shaver, a Certified Zentangle Teacher (CZT),  for an afternoon of learning all about Zentangles!
"Zentangle is an easy to learn, relaxing, and fun way to create beautiful images by drawing structured patterns. It helps to increase focus, creativity, and provides artistic satisfaction along with a sense of personal well being." 

We will be doing the 01-Basic class leaning some zentangles on tiles, and also receiving a mini kit (valued at $10.00).
Cost: $40.00
Call the store at 519-895-0554 to register! This class will fill up fast!


Beginner Copic Class with Janet
Thursday May 28th from 6pm -8pm.
Join Janet for an evening of colouring using Copic Markers. This class is for beginners and you will learn how to colour and shade skin, hair and a few other goodies.
Cost: $20.00

Teacher Gift Class with Janet
Saturday May 30th from 1-4pm
 Get a jump start on your teacher gifts with Janet. Make 2 altered notepads and an envelope filled with notecards!
Cost: $25.00

--------------------------------------------------------------------

Call the Scrapping Bug at 519-895-0554 or email us at orders@thescrappingbug.com to register for any classes or crops!

Monday, April 13, 2015

My Canvas Creations

Hello everyone!!!!  Today I would like to share with you two new 9 x 12 canvases that I recently completed.The first one I kept to the pastel colours.  And the second one I did the heritage look.  I am also giving you a surprise tutorial on one of the items that I made and added to the pastel canvas below.  I'll let you know in a minute.
For this canvas I first started by applying several mixed media items to the canvas.  You can see there is netting, cheese cloth, dry wall tape, and several different stencils with moulding paste.  I then painted the entire surface with gesso then I sprayed the canvas using colours that matched the flowers that I planned on using.  I gave it lots and lots of texture.
I found the frame in the centre at my local craft store.  I then cut some pieces of matching paper from my scrap bin and placed them to the outside without adhering.  The picture inside the frame was from my stash.  I liked it so much that I decided to adhere it to the back of the frame.  I added the frame to the canvas next adjusting the papers to fit then adhered the papers down.  I began placing my flowers around the frame, without adhering, until I got the look that I wanted.  Then I simply adhered them down with a hot glue gun.  I added some metal pieces here and there.

Here is a couple of close-ups.

Now for the surprise tutorial.  See the leaves under the owl below.  I made those using polymer clay, leaf fondant cutters and a rolling pin.

This is all you will need.

  Very easy.  Simply roll out the polymer clay very thinly.  Cut out the shape with the cutter, add veins using a toothpick, slightly roll up the edges so the leaves aren't completely flat.  Bake them in the oven at 250 degrees for about 15 minutes.   And lastly, you can paint them in any colour you want using any kind of craft paint.   And there you have it, easy to make leaves.  Lots of other cutter designs you can use as well. 

Here is the other canvas.

For this canvas I applied a good thick coat of gesso on the canvas surface.  I inked the outer edges with a brown ink and came in a bit with the ink on the corners.
To start with I cut several pieces of heritage papers layered them to create a background for my picture.  I did not adhere the papers onto the canvas just yet.   I then added my picture to the papers, first mounting it on chipboard then I adhered with pop dots.  Oh yes,  that picture is not a family picture - It is a card from Tim Holtz "Found Relatives" cards.  These are great for something like this.
The diamond shaped chipboard pieces is from Dusty Attic.  I simply cut different sized pieces and laid them down where I wanted them to go.  Before adhering, I placed the papers with the picture on it onto the canvas, adjusted if necessary then adhered everything down.  The rest of the items are again from my stash of goodies - flowers, more chipboard pieces, and metal items.  When I was completely finished, I accented here and there around the main section with paints and a paint brush.  Just randomly here and there.
Here a couple of close-ups.


I hope I have given you some ideas and a bit of inspiration.
Until next time
"Memories are like keepsakes, always to be treasured."

Monday, March 23, 2015

Weekend Crop coming Soon!


First I want to apologize for any confusion I may have caused sending out yesterday's email...  we are 
holding a weekend crop at our store on Friday April 10th from 10am - 11pm, and Saturday April 11th from 10am - 11pm. This just happens to be Scrapfest weekend, I didn't mean to call it a Scrapfest crop. I do apologize!

Join us for one day or two and join in on some creativity and laughter!!  The cost for one day is $40.00, or sign up for both days and pay $70.00

This includes lunch and dinner each day, as well as snacks, beverages, games and prizes!

Call the store now to register as spots are filling up.  519-895-0554 and let us know if you are attending Friday, Saturday or both!

Hope to see you then!

Wednesday, March 11, 2015

Hello everyone!!!  Sorry it has been a while since my last posting.  I have been away on vacation (it sure is sunny and warm in Mexico).  This is a recent layout that I did using some basic mixed media techniques.

I painted a thin coat of matte medium to the background paper.  This helps to prevent the paper from warping which can happen when you add wet mixed media items.    I painted a thin watered down coat of gesso mainly in the areas where I was going to spray.   The background paper had a hexagon design on it so I used sprays that were the same colour.  I sprayed  first with a light pink then with a seafoam colour.  After the sprays dried,   I then added some white texture paste with a dot stencil.  Let the paste dry.   For more texture I randomly heat embossed white embossing powder on top of where the dots stencil was used.  You can see below the extra texture it gave.   I then randomly and lightly stamped using black ink.  I used very little ink, just enough to highlight the background.  You can see a bit of the stamp at the bottom right of the picture below.


The frame is a wood frame.  I painted it with white gesso first then I heat embossed some white embossing powder over the surface.  I then added  the seafoam spray here and there.  I also wiped back some of the spray with a baby wipe as I only wanted it to appear randomly.


I cut different sized pieces of paper from matching papers from my stash and layered them as shown on the right side of the frame.  When I added my papers to the background paper, I added my picture to the frame, then added the frame next using pop dots to raise it off the page.


The large flowers were from my stash so I decided to spray them with the same seafoam coloured spray.  I then embossed the white embossing powder randomly on the surface to give more texture.  Before adding these flowers, I added a piece of cheese cloth, fluffed it up, then placed the 3 flowers as shown.  Added in a few pink and white flowers and a strip of lace under the frame.  At the left side I took some crocheting string, bunched it up and added it to the left side of the frame.
And there you have it.
Until next time,
HAPPY SCRAPPING
and remember
You must do the thing you think you cannot do.   
                                                       Eleanor Roosevelt


Thursday, February 26, 2015

February Updates at The Bug

February Updates

It is hard to believe that it is almost the end of February! I don't know where the time goes, but it is almost spring!!! (we need to tell Mother Nature this!).
Thought I would share with you some news I have.... some of our new product has arrived... WRMK Cakes & Candles, AC Boxed Card sets, and some bazzill cardstock. Unfortunately, the rest of our shipment is sitting on a dock somewhere!! As soon as we here from AC, I will let you all know where all our... goodies are! To arrive in this will be Crate Paper, Pink Paislee, American Crafts, Bazzill, Amy Tangerine, Shimelle 2, and much much more!!!
We are expecting an order from Memory Box any day, and also from Ranger with all the new stamps and paints that they have!
Hope it all arrives soon!!!


Upcoming Classes
Check our calendar for a list of upcoming classes in March!
Here are a few to let you know what we are up to!


March 7th - 1-4pm: Copic Class with Janet using some cute C.C. Design stamps. Cost: $30.00


March 11th - 6:00 - 8:30 pm: Mixed Media Layout Class with Donna. $15.00


March 21st - 10:30 - 1:30 pm: Copic Class with Bev using some beautiful floral stamps from C.C. Design stamps.
Cost: $30.00


Check the calendar for more classes to be posted soon!


  Upcoming Crops

             This Saturday is our Pot Luck crop, and we are full!! Here is a list of the crops for March: (due to holidays and such, we are having only 2 crops in March.


Friday March 20: 5 - 10pm. Cost: $5.00. Snacks included and we usually order out for dinner!


Saturday March 28th: Pot Luck Crop!
4-11pm. Cost: $5.00
(This crop is filling us fast,
so call the store to reserve your spot soon! )


Call us at 519-895-0554 to register for all classes and crops.
Stay warm out there!

Monday, February 16, 2015

"Fairies" Mixed Media Album

Today I thought I would share with you a mixed media album I completed called "Fairies".  I have 4 granddaughters that love fairies, princesses, and bling.  So I created this album for them to look at when they come over to the house.  I used lots of mixed media products for each page.  The fairies pictures were pinned from Pinterest along with the quotes.  I had fun creating this and it will sit beside my Old Age book.
Starting with the front cover


The back of the front cover is my favourite.  I created a fairies home.  After all fairies do live in houses nestled in a tree in the forest.  This was the most work.  I stencilled the roof and bricks with moulding paste - sprayed the roof with a brown spray then added lots of brown glitter.  Added some green sprayed cheesecloth to act as moss,die cut a door.  The purple and green sparkly stuff at the bottom is actually chopped up plastic that you put in the bottom of a decorative glass flower pot.  (found it at Ikea)  I added some flowers, cording, pearls and other embellishments.  I think any fairy would love to live here.

All of the quotes were from Disney movies.
And the rest of the pages


I hope you enjoy.  Until next time,
"HAPPY SCRAPPING"
"Far away in the sunshine are my highest inspirations.  I may not reach them,
but I can look up and see the beauty, believe in them and try to follow where they lead."
.......Louisa May Alcott

Monday, February 02, 2015

IMPORTANT NOTICE

Due to the nasty weather and the buildup of snow, The Scrapping Bug will be closed today! Regular hours commence tomorrow.

Sorry for the inconvenience.... and have a safe day!

Thursday, January 29, 2015

New Mixed Media Canvas Design

Today I thought I would share with you a 9 x 12 mixed media canvas that I completed.  Everything I used on this canvas was from my stash.  Canvases are a great way to use up a lot of your items that have been waiting to be used.   I am going to give you a brief tutorial on how I achieved this.  The picture is from a box of goodies.  You can use an actual picture of somebody if you wish.


I first took my canvas and painted a coat of clear gesso over the entire surface.  This gives a good foundation for all the other products that I applied.  I then took a patterned paper and tore a large piece off to go down the centre of the canvas.  I adhered the piece using matte gel meidum which is my favourite.  I tore smaller pieces of another patterned paper and adhered on top of the centre piece as shown below.  I then put a coat of the matte gel medium on top of the papers.


I then took a stencil and using modeling paste I placed the stencil around the perimeter of the papers.


Next with watered down gesso, I painted the entire surface of the canvas to seal everything but also to blend everything together.  I watered it down as I wanted the pattern paper to show through but to be softened as well.  

I wanted to use up some sprays that I have had for some time so I sprayed around the perimeter of the canvas with a light brown spray (Lindy's  Moon Shadow Mist).  Dried it then I came back with Heidi Swapp Gold Color Shine over the brown.  After letting everything dry I pulled out some Silks paint Olive Vine and Golden Monarch and added that onto the modeling paste sections.  When the sprays and paint were dry, I stamped around the perimeter with black staz-on ink using a circle stamp and a flourish stamp.  You can see this on the completed canvas picture.


To finish, I selected a few journaling blocks from my bin of goodies and added those around the centre section.  You can see one of them in the upper left corner, another at the bottom left side and one under the key on the right side. The frame was white so I dabbed black staz-on ink and some gold spray here and there.  I adhered the frame in the centre by doubling up glue dots to raise it up.  That made it easier to tuck flowers under the edge of the frame.  I cut an old scalloped metal circle in half and added one half to the top and the other to the bottom.  I then added my flowers around the frame, a large black key, and some metal pieces here and there.  And finally, which is an easy technique, with a small paint brush, I put white gesso onto the tips of the flower petals to soften everything.  Here are couple of closeups.


I hope you enjoyed another new canvas.  Until next time, this is Donna wishing you a happy and creative day and remember
"There are no shortcuts to any place worth going."
                                                                     Beverly Sills
HAPPY SCRAPPING

Tuesday, January 20, 2015

January Update at The Scrapping Bug

Well.. CHA is over, and we have placed a ton of orders!!! LOTS of new goodies to start shipping the end of January!!


The next newsletter will have a list of all we have ordered!! 


Product of the Month           
            This month we are featuring all the albums and page protectors we have in stock! All companies are 25%!!  Come in soon to check these out before they are gone!
 
Also... the Scrapbook & Cards Scrapbook Planner and Sketch Calendar is 25% off as well!    


January Classes and Crops           
  
January is shaping up to be a busy time at The Bug for classes and crops! There are still a few spaces left in the classes, so call to reserve your spot: 519-895-0554 or send us an email at  orders@thescrappingbug.com and we will get your name down!
 
 
Mixed Media Frame Class
 
January 31 - 10:00 -1:00pm
 
Join Donna to learn some mixed media techniques while completing this gorgeous 8X10 frame.
 

Cost: $22.00
Bring: a strong liquid adhesive, scissors, trimmer, inking tool, and any sprays if you want it different from this sample colour.
 
 
GORJUSS stamps Copic Class
February 7th
1:00 -4:00pm
 
Join Janet today to make 6 gorgeous cards using Gorjuss Stamps and Copic Markers. Here are a couple of example of these adorable stamps! You will be making 6 different cards in this class. 
 

 Cost: $30.00
 
 
Stamping Bella Copic Class
 
February 21st from 10:30 am - 1:30 pm
 
Join Bev for a class using some fun Stamping Bella Stamps! They are just too cute!!  Here is an example of one of the cards! You will be making 6 different cards in this fun class!
 
 
 ** Check our Calendar for photos of classes**
 
Crop Nights: Join us for some fun evenings of cropping!
                    
                 Friday  January 23: 5-10pm
             
                 Saturday January 31: 4-11pm **POT LUCK**
 
                 Friday February 6: 5pm - 10pm
 
                 Friday February 20: 5pm -10pm
 
                 Saturday February 28: 4pm - 11pm *POT LUCK*
 
               
  Cost: $5.00 , snacks and drinks included.
 
 
As you can see, the last Saturday crop of each month is going to be Pot Luck! We tried this in December and it was a hit!! Call the store to reserve your spot, and let us know what you are bringing!
 
     Remember to check all the details on our website


ALL DAY Valentines Day PJ Crop           

Join us for a fun filled day of scrapping in your PJ's with some friends! That's right.... wear your favourite PJ's (and slippers of course!) all day long! Relax,  have fun, and of course crop the day away! Lots of food, goodies, treats and fun to be had by all! 

Cost: $40.00 for the whole day beginning at 10 am and ending at 11pm.
 
Call the store at 519-895-0554 to reserve your spot!
           
Date: Saturday February 14th! 


We're on Facebook!
To find out when new products arrive and all things happening at The Bug, we're posting it all on Facebook...
We'd love it if you LIKED us! 
Go directly to Facebook here  To follow us on Pinterest go here 
 
 
Sincerely,
Joanne, Helen and Janet

Thursday, January 15, 2015

Hello everyone.  Today I thought I would share with you a mixed media layout I did.  For my background paper I used a very old piece of Basic Grey patterned paper which has texture already on it.  I'm finding that since I have been doing more and more mixed media layouts I am using up papers that have been put away for some time.  So here is the layout.
 
I selected another piece of paper with hexagon striped pattern on it.  See the strip of paper on the left edge of the layout.  That is the second piece of paper.  I cut a 1" strip off the edge of the background paper then I cut a strip 1 1/2" strip off the edge of the striped paper.  I glued it down the left edge of the background paper making sure it measured 12" when I was done.  With the rest of the striped paper I tore off random strips of paper in different lengths.  I adhered these down to the background paper, longer one in the middle and shorter runs above and below this one.  It is hard to see in the picture but you can see the pattern of the paper coming through.  The strip on  the left edge just helped to balance the page.  With a spatula I painted white gesso over the paper pieces up and down then across.  Don't have to be too fussy and I did not completely cover the paper with the gesso.  I did it almost like a basket weave .  This will give more texture.
I then selected a stencil which looks like water bubbles.  Using moulding paste I applied it to the left side of the page in random spots and then again on the right side edge.  When everything was dry I randomly stamped here and there with a favourite stamp and black staz-on ink.   I selected a yellow, turquoise and green spray and first sprayed with the yellow, then the blue, and lastly the green.  You can see in the layout picture where I sprayed the colours.  I did let the green spray run a little by spritzing with water and slanting the paper so that it would run across the page.  The rest was easy.  I added some white cording along the right side edge of the picture, 3 die cut circles to the left of the picture and my flower sections with some cheese cloth behind them.  I edged the flowers with white gesso which is another fav technique that I like.   Made a couple of loopy bows and tucked them under the flowers.   I also edged my picture with white gesso to help it blend into the layout.
A couple of closeups.


I hope you enjoyed.  Until next time,

"HAPPY SCRAPPING"
and remember
The sunshine that comes from your heart is warmer than any that comes from the sky.

Thursday, January 01, 2015

Mixed Media Canvas Board

Hello everyone,  I hope you had a wonderful Christmas and I wish you a very happy New Year.
Today I thought I would share with you a mixed media project on a canvas board.  Canvas boards are great.  They are much thinner than a regular canvas and can be framed.

Again, I did a lot of texture on the background using netting, drywall tape, and a lot of moulding paste with several different stencils.  Below is a closeup of a couple sections on the canvas.


When the media items were completely dry I sprayed the entire surface with a gold spray, let this dry, then sprayed with a turquoise spray here and there, and finally with a darker blue spray in the corners and the side edges.  I did a bit of stamping here and there with black staz-on ink - just around where the flowers are.   I also added a bit of light pink paint (watered down) with a paint brush in and around the flowers. The picture in the frame was a last minute choice.  I had several of these in my stash and since it fit perfectly behind the frame, I decided to use it.  I dry brushed white gesso on most of the flowers, added some wood leaves painted with a texture paste and tucked in some metal pieces.  A few pearls here and there and there you have it.  Here is a close-up of a section of the flowers.


I hope you enjoy!
Until next time,
"Some people make the world more special just by being in it."