It's October!!
The leaves are changing colour, there is a crispness in the air, and it is a fantastic month to get some amazing photos of those Thanksgiving feasts, the colours of fall, and those little ghouls and goblins! And of course, you will want to scrapbook those memories.... so grab a coffee, sit back, and read about all the exciting new products and such that we have to offer to get that scrapbooking done!
We've Been Nominated!!
A huge Thanks to our customers who nominated us for this years Record Reader Award for Your Favourite Craft Store!!
We are thrilled!! It's because of our wonderful customers that we have that we strive to provide the best customer service. Thanks to all who will vote for us!
Cards for Kids!!
Just a little update.... A Huge Hug to Tammie White and Shirley Bish as they will be delivering 2 huge boxes of cards to SickKids Hospital in Toronto this coming week, and we want to take this opportunity to give a HUGE THANK YOU to all those wonderful people who have donated some pretty amazing cards!!! The kids will love them! I will update you on the delivery later!
We are going to continue to collect cards for the kids until the end of the year, so please help us out by donating some cards! They can be any theme, just keep the inside blank. These are for the kids to give to their visitors and such.
Our last 2 sessions of card making were a blast, so we have decided that this months cards for Kids session will be
Sunday October 19 from 10am - 4pm!
Stop by and bring your stash to make a card or two for a child to give to someone they love!
GARAGE SALE
Our Garage Sale was a huge success and we want to thank everyone who participated by bringing in their sale items and for those of you who waited in line to shop! Watch for a spring cleaning garage sale in the spring!
Classes at The Bug this month!
Christmas Copic Card class with Bev
Join Bev on October 18 from 10:30 - 1:30 to make 6 gorgeous Christmas Cards using new Whipper Snapper Stamps and the new Wink of Stella brushes! Both are so great to work with! Check out her cards online in the Calendar or at the store.
There are still a few spots left, so call 519-895-0554 to register or to put a hold on the stamps and Wink of Stella brushes!
The Older Crowd - Copic Card class with Janet
Join Janet as she makes some fun cards using the Art Impression stamps! (examples online soon)
Saturday October 11 from 1-4.
October Crops
Saturday Oct. 4: 4-11pm
Friday Oct. 10: 5-10 pm
Saturday Oct. 18: 4-11pm
Cost: $5.00 (includes drinks & snacks)
ALL DAY PJ CROP
Saturday October 25th
10am-11pm
Wear your PJ's for a fun filled day of scrapping and playing!
Call the store @ 519-895-0554 or email us at orders @thescrappingbug.com to reserve your spot.
New This Month!!
It has been non-stop this week with new products arriving in the store daily!! It's awesome!!
New in the store this past week has been:
Carta Bella - All Bundled Up
Authentique - Spirited, Grateful, and Classique: Pretty
My Favourite Things - numerous Dies and stamp sets
Echo Park - Designer Dies and Stamps (cute Christmas ones!)
Echo Park - Home for the Holidays and Christmas Cheer
Pebbles - Home for Christmas
Crate Paper - Maggie Holmes - Open Book
Dusty Attic - gorgeous chipboards
ADORNit - 4 new paper lines and decorative frames
Ranger - Dylusions - stamp sets, Wendy Vecchi Embossing
Powders, Tim Holtz Distress Stain Spray
I think that's all.... I may have forgotten a thing or two, but do stop by and check out all the goodies soon!!
Looking Forward
There are still lots of boxes of new product to be arriving this month...
Doodlebug Design: Frosty Friends and Happy Camper
Graphic 45 - Raining Cats & Dogs
Petaloo - Flowers and such
Heidi Swapp - September Skies
Pink Paislee - Bella Rouge
American Crafts - Amy Tangerine - Stitched
Bella Blvd - Hello Autumn, Tiny Tots, Halloween Magic, and Christmas Cheer
Needless to say.. it is a busy time at The Bug. Products will be on our online store soon after they arrive at the store.

Thursday, October 02, 2014

Wednesday, October 01, 2014
The Art of "OLD AGE"
Hello everyone!! Today I would like to share with you one of the most heart-warming and delightful Art Journaling/Mixed Media books that I have seen. It was designed by Helen the manager at the Scrapping Bug store and I was totally delighted when she gave me permission to show it to you. This book totally tickled my heart and I find it to be one of the most creative mixed media items that I have seen in a while.
The book is titled "Old Age".

Here are a few of the pages. The quotes are equally delightful and suit each picture perfectly.

The quote:
"Old age is the most unexpected of all the things that can happen to a man."

The left side picture quote:
"The great secret that all old people share is that you really haven't changed in seventy or eighty years. Your body changes, but you don't change at all. And that, of course, causes great confusion."
The one on the right is one of my favourites. The face and the quote puts a smile on my face.
"Some people, no matter how old they get, never lose their beauty
- they merely move it from their faces into their hearts."

The left side "The secret of a good old age is simply an honourable pact with solitude."
And the right side picture
"I pray to see another day."

"Sing out loud" says it all for this picture. Simply delightful.

The picture and quote on the left really made my day.
"There's one advantage to being 102.......there's no peer pressure."
Even though I'm not 102 yet, there is nothing further from the truth.
And finally the picture on the right, again makes for a chuckle.
"With mirth and laughter let old wrinkles come."
I hope you enjoyed this posting and I especially hope that it brought laughter to your heart and a smile on your face. I plan on making an "Old Age" book for myself - to sit on my coffee table and to look at when I want to brighten my day.
Until next time,
"In my next life, I'm going to have more memory installed."
Thanks, Helen, for your creativity and insight.
Monday, September 22, 2014
The Scrapping Bug News
| GARAGE SALE |
For those of you who have signed up to participate in our garage sale, just a reminder that all your items are to be to the store before 5pm Tuesday September 23. Thanks!
Shopping starts September 27th from 9 - 4pm for our annual garage sale! Come early for some great shopping deals!
If you want to participate, there is still time to sign up! Call 519-895-0554 or email orders@thescrappingbug.com to reserve a spot!
|
We have lots of new products that arrived this week ....
Memory Box Dies
The Dusty Attic chipboard!!! Yup... and it is gorgeous! (just saying!)
ADORNit decorative frames and paper lines.
Little B Decorative Tape
And next week we expect to see Authentique, Echo Park, Carta Bella, Ranger, Pertaloo, Bella Blvd, and lots more!
Stop by and check out all the new goodies!! ------------------------------ For the month of September we will be showcasing our very own "The Scrapping Bug". Did you know that The Scrapping Bug has a group of super talented ladies that make our original take & make kits? That is right.. and this month, we want to Thank them! A HUGE Thank You to Donna McLean & Janet Boyd for making the majority of our one of a kind original kits! Of course, the girls at The Bug make some too, but the majority are made by these talented ladies!! Thanks! There are new kits available now and new kits arriving weekly. In September, for every kit you buy, you will get a ballot. At the end of the month, we will pick a winner and they will receive 3 free kits (value of about $50.00). Come check them out! They are gorgeous! |
| Classes and CROPS at The Bug |
Check out our calendar for a list of classes we have ready to go for the rest of the year, and crops too! More about these in the next newsletter! CALENDAR
Register early, as classes fill fast. Call the store at 519-895-0554 or email us at orders@thescrappingbug.com to reserve your spot.
|
| ALL WEEKEND CROP **Date Change** |
We will be having our first weekend crop January 17 and 18th, 2015.... That's right.. a whole weekend of laughter, playing, and eating!! The crop will be Saturday January 17 from 10am - midnight, and returning Sunday January 18 from 8am - 4pm. There will be games, prizes and a ton of food!
Cost: $65.00 for the weekend!
Sign up early, as I can imagine that this will fill up fast!
|
Sincerely,
Joanne, Stephanie, and Helen
|
Thursday, September 18, 2014
A New Sketch
Since I haven't posted a sketch for a while I decided I would share this one with you along with a layout based on this sketch. I have included some measurements for you. When you see lines and some circles drawn in some of the sections - this simply means this is one piece of patterned paper. That way you can see better where the papers start and end. Again, referring to the picture of the layout is the best way to see the various papers and their placements.
THE SKETCH

THE LAYOUT

I have found that using multiple papers with different designs, you can do simple embellishments, especially for a cute little boy layout. I used the navy paper to act as an accent for the pictures. I always try to make sure that each paper has pretty much the same colours in them,
however, the navy paper did give it a bit of a punch. I made sure that I had it in two other spots.
I tied some thread through the buttons and adhered them to the flags. For a girl layout instead of buttons add some flowers. Take this basic sketch and make it your own.
Until next time,
to all you
"HAPPY SCRAPPERS"
"The world is an incredible unfulfilled tapestry. And only you can fulfill the tiny space that is yours."
Wednesday, September 17, 2014
The Bug Updates
There is one spot left for Donna's altered frame class this Saturday! Call the store at 519-895-0554 to register.
Also... Little B decorative tapes arrived in the store yesterday... and they are gorgeous! Just saying!!
Dusty Attic chipboard is to arrive any day now! I can't wait!
Echo Park, DoodleBug, Petaloo, Graphic 45 (Raining Cats and Dogs), Carta Bella, Ranger, and many more to be arriving soon too!
Our weekend crop that was scheduled for October 25 and 26th, has been changed to January 17-18th. We will be having an all day PJ crop on the 25th instead! Wear your favourite PJ's all day long and come join us or a fun filled day of food, laughter, and lots of treats! (even the boss will be in her PJ's... even if she doesn't know it yet!).
Check back often, as there is lots happening these next couple weeks!
Also... Little B decorative tapes arrived in the store yesterday... and they are gorgeous! Just saying!!
Dusty Attic chipboard is to arrive any day now! I can't wait!
Echo Park, DoodleBug, Petaloo, Graphic 45 (Raining Cats and Dogs), Carta Bella, Ranger, and many more to be arriving soon too!
Our weekend crop that was scheduled for October 25 and 26th, has been changed to January 17-18th. We will be having an all day PJ crop on the 25th instead! Wear your favourite PJ's all day long and come join us or a fun filled day of food, laughter, and lots of treats! (even the boss will be in her PJ's... even if she doesn't know it yet!).
Check back often, as there is lots happening these next couple weeks!
Wednesday, September 10, 2014
| Just a little update... |
Just a few new things happening at The Scrapping Bug I wanted to fill you in on....
|
| GARAGE SALE |
Shopping starts September 27th from 9 - 4pm for our annual garage sale! Come early for some great shopping deals!
If you want to participate, there is still time to sign up! Call 519-895-0554 or email orders@thescrappingbug.com to reserve a spot!
|
| Cards for Kids!! |
Our next card session get together to make Cards for Kids for Sick Kids Hospital will be Sunday September 21st from 1-4. Stop by and bring your stash to make a card or two for a child to give to someone they love!
If you can't stop by, we will accept any themed card at the Store... remember.. just keep the inside blank! We have a ton of cards already... THANK YOU!!!! If we have more than we can donate to Sick Kids, we will donate to McMaster and London Hospitals too!
See you then!
|
We have a month full of exciting classes!
Christmas Copic Card class with Bev
September 13th from 10:30 - 1:30
Cost: $30.00 for 6 cards.
Whipper Snapper stamps are in the store now.
Vintage Frame with Donna (SOLD OUT)
Donna has made this gorgeous vintage frame chock full of all kinds of techniques and goodies....

Christmas Card Workshop with Donna
Join Donna September 23 from 1-3 or from 6-8 to get together to create 5 stunning vintage Christmas cards...
Beginner Copic Class with Janet
September 24 from 6-8pm.
Cost: $15.00 if you have markers
$25.00 if you use ours.
All Copics on sale 20% off our already low price for registrants!
Call the store at 519-895-0554 for more details, or check out our calendar on our website... www.thescrappingbug.com ------------------------------ Crops in September: (still a few spots left!!) Friday Sept. 12: 5-10 pm Saturday Sept. 20: 4-11pm Cost: $5.00 (includes drinks & snacks) We usually order out for dinner too! ------------------------------ We have lots of new products that arrived this week .... Simple Stories: Sweater Weather, Cozy Christmas, Christmas DIY, Legacy, and a few extra goodies too! Bo-Bunny: Souvenir, Candy Cane Lane, Madeline, Wild Card, new Sprays, pastes, wood veneers, pearls and lots of other papers and embellishments to go with these adorable lines. Doodlebug: Ghouls & Goodies, Friendly Forest Echo Park: Arsenic & Lace, Fine & Dandy, Christmas Cheer, Home for the Holidays, Creative Agenda, Themed Packs (too many to mention!), stamps and dies Carta Bella: Christmas Time
These products are to arrive soon....
Bella Blvd: Hello Autumn, Tiny Tots Petaloo: a ton of gorgeous flowers and stuff! Memory Box - Dies And in a week or two we will be getting a big box of goodies from Ranger and Dusty Attic!!!!!!!!!! (there goes my pay check!). And I am sure there are some that I am forgetting! But as you can see, we will be busy this next couple weeks! Stop by and check out all the new goodies!! ------------------------------ For the month of September we will be showcasing our very own "The Scrapping Bug". Did you know that The Scrapping Bug has a group of super talented ladies that make our original take & make kits? That is right.. and this month, we want to Thank them! A HUGE Thank You to Donna McLean & Janet Boyd for making the majority of our one of a kind original kits! Of course, the girls at The Bug make some too, but the majority are made by these talented ladies!! Thanks! There are new kits available now and new kits arriving weekly. In September, for every kit you buy, you will get a ballot. At the end of the month, we will pick a winner and they will receive 3 free kits (value of about $50.00). Come check them out! They are gorgeous! |
| ALL WEEKEND CROP |
We will be having our first weekend crop October 25 & 26th! That's right.. a whole weekend of laughter, playing, and eating!! The crop will be Saturday October 25th from 10am - midnight, and returning Sunday October 26th from 8am - 4pm. There will be games, prizes and a ton of food!
Cost: $65.00 for the weekend!
Sign up early, as I can imagine that this will fill up fast!
|
| October Classes |
Check out our calendar for a list of classes we have ready to go for October! More to come on those in the next newsletter! CALENDAR
|
September Happenings at The Scrapping Bug!
I hope you are enjoying this busy month so far! Here is a little update on what is happening at The Scrapping Bug this month!
Classes for September are filling up...
Saturday September 13 is Bev's Christmas Card Copic class.
Saturday September 20 is Donnas Frame class (SOLD OUT)
Tuesday September 23 is Donna's Christmas card Workshop from either 1-3 or 6-8pm.
Wednesday September 24 is a beginner Copic Coloring Class with Janet from 6-8pm.
Call the store at 519-895-0554 for more details, or check out our calendar on our website... www.thescrappingbug.com
------------------------------
Saturday September 27th is our annual Garage Sale! The store will be open at 9am for shopping for some great deals!
If you still want to participate, there is time.. give us a call and we will get you set up with all you need to know! 519-895-0554.
------------------------------
Crops in September:
Friday Sept. 12: 5-10 pm
Saturday Sept. 20: 4-11pm
Cost: $5.00 (includes drinks & snacks)
We usually order out for dinner too!
Call the store at 519-895-0554 to reserve your spot!
------------------------------
Sunday September 21 from 1-4 is our Cards for Kids get together! Bring your supplies and join us to make a couple cards for the kids at Sick Kids Hospital in Toronto. We have already have a ton of cards for the kids, but we can use more!! If we have too many to donate to Sick Kids, we will be donating them to McMaster and London hospitals too!! Any themed card will do... just keep them blank inside! These are for the kids to give to their visitors!!
If you can't make it, just drop off your cards at The Scrapping Bug! We really appreciate all you have done so far!!
------------------------------
We have lots of new products arriving this week and I have to say...I can't wait!!!!! Here is a sample of all the new goodies arriving by the end of this week/ beginning of next...
Simple Stories: Sweater Weather, Cozy Christmas, Christmas DIY, Legacy, and a few extra goodies too! HAS ARRIVED!!!!
Bo-Bunny: Magic, Candy Cane Lane, Madeline, Sprays, pastes, wood veneers, pearls and lots of other papers and embellishments to go with these adorable lines. HAS ARRIVED!!!!!!!!
Doodlebug: Ghouls & Goodies, Friendly Forest HAS ARRIVED!!!!!!!!!
Echo Park: Arsenic & Lace, Fine & Dandy, Christmas Cheer, Home for the Holidays, Creative Agenda, Themed Packs (too many to mention!), stamps and dies HAS ARRIVED!!!!!!!!
Carta Bella: Christmas Time HAS ARRIVED!!!!!!!!
Bella Blvd: Hello Autumn, Tiny Tots
Petaloo: a ton of gorgeous flowers and stuff!
Memory Box - Dies
And in a week or two we will be getting a big box of goodies from Ranger and Dusty Attic!!!!!!!!!! (there goes my pay check!).
And I am sure there are some that I am forgetting! But as you can see, we will be busy this next couple weeks!
Stop by and check out all the new goodies!!
------------------------------
Product of the Month NEWS
Last month we had American Crafts as our Company for the month with a raffle for those of you who bought the new AC lines that we got it.. well.. the Boss picked a winner, and Lee Anne Skipper is the winner of a $50.00 gift certificate from the store and a basket of goodies! These will be ready after Wednesday for you to pick up! Congrats!!
------------------------------
For the month of September we will be showcasing our very own "The Scrapping Bug". Did you know that The Scrapping Bug has a group of super talented ladies that make our original take & make kits? That is right.. and this month, we want to Thank them!
A HUGE Thank You to Donna McLean & Janet Boyd for making the majority of our one of a kind original kits! Of course, the girls at The Bug make some too, but the majority are made by these talented ladies!! Thanks!
There are new kits available now and new kits arriving weekly. In September, for every kit you buy, you will get a ballot. At the end of the month, we will pick a winner and they will receive 3 free kits (value of about $50.00).
Come check them out! They are gorgeous!
Chat to you soon!
Classes for September are filling up...
Saturday September 13 is Bev's Christmas Card Copic class.
Saturday September 20 is Donnas Frame class (SOLD OUT)
Tuesday September 23 is Donna's Christmas card Workshop from either 1-3 or 6-8pm.
Wednesday September 24 is a beginner Copic Coloring Class with Janet from 6-8pm.
Call the store at 519-895-0554 for more details, or check out our calendar on our website... www.thescrappingbug.com
------------------------------
Saturday September 27th is our annual Garage Sale! The store will be open at 9am for shopping for some great deals!
If you still want to participate, there is time.. give us a call and we will get you set up with all you need to know! 519-895-0554.
------------------------------
Crops in September:
Friday Sept. 12: 5-10 pm
Saturday Sept. 20: 4-11pm
Cost: $5.00 (includes drinks & snacks)
We usually order out for dinner too!
Call the store at 519-895-0554 to reserve your spot!
------------------------------
Sunday September 21 from 1-4 is our Cards for Kids get together! Bring your supplies and join us to make a couple cards for the kids at Sick Kids Hospital in Toronto. We have already have a ton of cards for the kids, but we can use more!! If we have too many to donate to Sick Kids, we will be donating them to McMaster and London hospitals too!! Any themed card will do... just keep them blank inside! These are for the kids to give to their visitors!!
If you can't make it, just drop off your cards at The Scrapping Bug! We really appreciate all you have done so far!!
------------------------------
We have lots of new products arriving this week and I have to say...I can't wait!!!!! Here is a sample of all the new goodies arriving by the end of this week/ beginning of next...
Simple Stories: Sweater Weather, Cozy Christmas, Christmas DIY, Legacy, and a few extra goodies too! HAS ARRIVED!!!!
Bo-Bunny: Magic, Candy Cane Lane, Madeline, Sprays, pastes, wood veneers, pearls and lots of other papers and embellishments to go with these adorable lines. HAS ARRIVED!!!!!!!!
Doodlebug: Ghouls & Goodies, Friendly Forest HAS ARRIVED!!!!!!!!!
Echo Park: Arsenic & Lace, Fine & Dandy, Christmas Cheer, Home for the Holidays, Creative Agenda, Themed Packs (too many to mention!), stamps and dies HAS ARRIVED!!!!!!!!
Carta Bella: Christmas Time HAS ARRIVED!!!!!!!!
Bella Blvd: Hello Autumn, Tiny Tots
Petaloo: a ton of gorgeous flowers and stuff!
Memory Box - Dies
And in a week or two we will be getting a big box of goodies from Ranger and Dusty Attic!!!!!!!!!! (there goes my pay check!).
And I am sure there are some that I am forgetting! But as you can see, we will be busy this next couple weeks!
Stop by and check out all the new goodies!!
------------------------------
Product of the Month NEWS
Last month we had American Crafts as our Company for the month with a raffle for those of you who bought the new AC lines that we got it.. well.. the Boss picked a winner, and Lee Anne Skipper is the winner of a $50.00 gift certificate from the store and a basket of goodies! These will be ready after Wednesday for you to pick up! Congrats!!
------------------------------
For the month of September we will be showcasing our very own "The Scrapping Bug". Did you know that The Scrapping Bug has a group of super talented ladies that make our original take & make kits? That is right.. and this month, we want to Thank them!
A HUGE Thank You to Donna McLean & Janet Boyd for making the majority of our one of a kind original kits! Of course, the girls at The Bug make some too, but the majority are made by these talented ladies!! Thanks!
There are new kits available now and new kits arriving weekly. In September, for every kit you buy, you will get a ballot. At the end of the month, we will pick a winner and they will receive 3 free kits (value of about $50.00).
Come check them out! They are gorgeous!
Chat to you soon!
Monday, September 08, 2014
My Mixed Media Canvas Set
Referring back to a tutorial that I did in June for a 9 x 12 mixed media canvas, I thought I would share with you two more canvases I did to make a set of three.
They have been done the same way as the first one in June.
Here is the first one I did first with a couple of closeups.


Here are few closeups of #2 canvas.


And the third canvas, again using different items to create a scenic look.

And again a couple of closeups of the third canvas.


I currently have them hanging on my wall, side by side.
Giving them a scenic look makes them look quite nice in a series.
I hope you enjoy. Can't wait to get started on my next series.
Until next time
To all you "HAPPY SCRAPPERS"
"Things turn out best for the people who make the best out of the way things turn out."
Art Linkletter
Saturday, August 30, 2014
Mixed Media Layout
Since I have been doing a lot of mixed media layouts and canvases, I thought I would share a layout that I did with some basic mixed media techniques.

For this layout I took a piece of paper that had a very basic pattern running through it. This was the background. I then took another piece of paper, again with a very soft design on it, tore it down the right side of it and adhered it to the background piece. Using watered down gesso and a paint brush, I lightly painted over the papers to blend them together. Dry the gesso completely.
Using a vine stencil, on the upper right side and bottom right corner, I applied green ink onto the stencil.
I then applied moulding paste on the left side corners and bottom right corner using a honeycomb stencil. I also used a stencil with flourishes on it on the outside edges. Love my stencils. I heat set the moulding paste. I then took some turquoise spray and sprayed randomly all over the papers. I came back with a green spray mostly along the edges and corners. Then splattered a pink spray here and there.

When everything was completely dry I randomly applied a stamp with black stazon ink. You should always use a staz-on type of ink when doing mixed media. This will guarantee that it will not rub off or blend.
Behind the picture I cut and applied two papers making sure that they were cut so that you could see them coming out from behind the picture. I next adhered my picture to chipboard and put it down using pop dots. I like to do this as it sets the picture off of the layout and gives it a 3-D look.

Cheese cloth is another one of my fav things to use. I loosely adhered a piece onto the layout. Placed some flowers onto the cheese cloth. The little wood frames I added a piece of music paper in behind. Little things like the frames gives the layout some extra "oomph". Inked and added the butterfly and there you have it.
I hope you enjoy.
Until next time to all you
HAPPY SCRAPPERS
Have a great day!!!
"What lies behind us, and what lies before us are tiny matters,
compared to what lies within us." Ralph Waldo Emerson
Saturday, August 16, 2014
Two Page Layout
Hi everyone!!! I thought I would share with you a two page layout I did of my granddaughter with some sort of weird hairdo going on. Of course I had to scrapbook them as I quite enjoy these kinds of pictures. Something I can bribe her with when she is 16.


Close-up of first page.
I first did some texturizing of the background with stencils and moulding paste. I used 6 different papers with different designs on them. They were all from the same Bo Bunny line and were co-ordinated to go together. I pretty much cut different sizes and shapes of the papers and laid them down, tucking them under each other, until I got the pieces balanced. I discovered that by adhering my pictures to a piece of chipboard, they take on a 3D look. I have been doing this with all my pictures on other layouts. I laid the pictures down where I wanted them to go so that I could work the papers around them. Then I adhered the papers down, the pictures next. Added a few embellishments here and there and I was done.
I hope you enjoy.
Until next time
To all the "HAPPY SCRAPPERS"
and my granddaughter
If I could reach up and hold a star for every time you've made me smile,
the entire evening sky would be in the palm of my hand.
I hope you enjoy.
Until next time
To all the "HAPPY SCRAPPERS"
and my granddaughter
If I could reach up and hold a star for every time you've made me smile,
the entire evening sky would be in the palm of my hand.
Sunday, August 10, 2014
August UPDATE
Cards for Kids!!
Our dear friend Tammy White, of The White House, has been in contact with SickKids Hospital in Toronto, and they need our help! They are in need of cards for their kids to give to their visitors! As card makers and scrappers, we thought we could help!
If you have extra cards that you've made or want to make a few for the kids, drop them off at The Scrapping Bug a...nd we will get them to the kids for you! The only thing they ask, is that the inside of the card must be blank, so that the kids can write what they want. (also make sure there is an envelope along with it!).
Also.. if you want to come out and make some cards with us, we are going to get together every third Sunday of the month, from 1-4pm to make some cards. Bring your stash and join us!
The first one will be AUGUST 17 from 1-4pm.
Hope to see you then!
~~~~~~~~~~~~~~~~~~~~~~~~~~~~~~
Classes at The Bug this week!
Join Donna Tuesday Aug. 12 from 1-3 and make 5 gorgeous vintage cards! There are a couple spots left, so give the store a call
@ 519-895-0554 to register.
------------------------------
Join Janet Saturday August 16 from 10:30 - 1:30 to make 5 gorgeous cards using Copic markers! Call the store to register...
519-895-0554. A few spots left!!!
------------------------------
FRIDAY CROP NIGHT: Friday August 15 - 5pm - 10pm.
Registration required, call 519-895-0554 to reserve your spot!
~~~~~~~~~~~~~~~~~~~~~~~~~~~~~~
New This Week!!
We got some new products this week (and I have to say... they are adorable) ...
American Crafts - Shimelle
Pebbles - Jen Hadfield
Crate Paper - Notes & Things
Pink Paislee - Solstice
All products will be on line tomorrow!!
Stop by and check out all the new goodies!!
Friday, August 01, 2014
"Stuff" From Stash Canvas
Today I thought I would share with you another canvas that I did at our bi-weekly Art Night at the Bug. Again with this one, I had no plan. It was strictly trying different methods to get the desired look. Below is the canvas.

The canvas size is 8" x 10". I first selected various patterned papers that went well together. From these papers I cut strips to make a background on the canvas. I decided to do a basket weave effect using the strips of paper. I thought of other ways, but the basket weave seemed to be the one. I didn't worry about how straight the strips were so I cut them by hand.

Using matt gel medium I adhered the strips down and added more gel medium to the surface of the strips. I trimmed the strips off the side and bottom edges of the canvas.
I then applied a thin coat of gesso over the strips to blend them together.
I next took two stencils as shown and applied moulding paste to the canvas.
You can see in the canvas picture where I added the moulding paste.
I then took some turquoise paint, put a small amount above the sections of moulding paste, and sprayed clear water onto the paint. This allowed the paint to become runny. I put the canvas on its end and let the paint flow over the moulding paste. I added more water to keep the flow going. I did this in several places.

When the turquoise was dry, I watered down some yellow paint in a tray, and using a paint brush I added it in and around the turquoise paint. You can see this above. You can also see the paper strips creating even more texture.
And to finish: I cut more strips of the paper and layered them close to the upper left corner.
I cut a piece of paper from the flowered paper I selected for the back of the picture. Also cut a doile in half and added to the right side of the picture.
Below is a close-up of the collage items I did around the picture. I took flowers from the bag of goodies that I had , laid them down and moved them around until I got the look I was going for. I actually had the flowers down the left side of the picture. I wasn't happy with it, so I moved them.

I accented the larger flowers using the turquoise and yellow paint as well as some gesso. I added some metal embellishments and a resin decorative frame. I also highlighted the metal with the paints. I placed dots of yellow dimensional pearls here and there and using a black pen I drew around some of the diamond patterns of the moulding paste.

I hope you enjoyed this as much as I enjoyed doing it.
Mixed media is such a fun way to let your inner creativity come to the surface.
Try it. You will definitely surprise yourself.
Until next time,
to all you HAPPY SCRAPPERS
"If you are lucky to be different, don't ever change."
It's August!!
Each month we are going to be showcasing a company that catches our eye.... and American Crafts is our company this month! As you know, American Crafts now owns many companies that we all love.... Becky Higgins, Crate Paper, Heidi Swapp, Imaginisce, Pebbles, Pink Paislee, Studio Calico, Bazzill, American Crafts, and recently.. We R Memory Keepers.
To honour this growing company, we are going to do something a bit different.... for every $25.00 spent on any of these companies products that we have in the store and on-line, you will receive a ballot to enter for the grand prize draw at the end of the month. That is right... $25.00 = 1 ballot. So, if you spend $50.00 you will get 2 ballots, etc.
The prize drawn on August 30th will be a $50.00 gift certificate to The Scrapping Bug, as well as a basket of goodies that we are sure you are going to love! Hope to see in store or online soon!
.JPG)

To honour this growing company, we are going to do something a bit different.... for every $25.00 spent on any of these companies products that we have in the store and on-line, you will receive a ballot to enter for the grand prize draw at the end of the month. That is right... $25.00 = 1 ballot. So, if you spend $50.00 you will get 2 ballots, etc.
The prize drawn on August 30th will be a $50.00 gift certificate to The Scrapping Bug, as well as a basket of goodies that we are sure you are going to love! Hope to see in store or online soon!
Also.. check out our August classes :
Donna's Vintage Cards
Tuesday August 12 : 1-3 or 6-8
Tuesday August 12 : 1-3 or 6-8
Mixed Media Travel Album:
Saturday August 23, 10-3
Saturday August 23, 10-3
****NEW****
Copic Card Class with Janet!!
Saturday August 16: 10:30 - 12:30
Saturday August 16: 10:30 - 12:30
(examples to be posted shortly!)
Spaces still available for the classes... call the store at
51-895-0554 to register, or drop us an email at
orders@thescrappingbug.com
51-895-0554 to register, or drop us an email at
orders@thescrappingbug.com
Saturday, July 26, 2014
Two New Layouts
Hello, everyone. Today I am sharing with you a couple of layouts that I did at my favourite scrapbooking retreat that I was at this past week. I decided to break away from the mixed media method and went back to my cute and easy layouts. The one below is my favourite as it is so fun and fresh looking.
Great for a summer picture.

I had a strip of chipboard that had a scalloped edge on it. I traced the edge all around onto the background paper and cut it out. I do know that you can get rulers that have scalloped edges on them similar to the chipboard strip that I used. I inked all the edges of all the paper pieces with a soft brown ink. I took my second piece of background paper, cut it down to about 10 1/2" square and adhered it to the first paper, centering it. I then took my black scripto pen and placed tiny dots around the scallops on the first paper and along the outside edge of the second paper. I also drew broken stitch lines around the inside edge of the second paper.
For the centre paper, using a stencil, I traced and cut out a decorative-edged piece and added that, again centering it. I also placed some dots around the inside edge of this piece.
And the rest was simple. I drew out some clouds, added some broken stitch lines around the outside edges and placed them down with pop dots. I die cut the sun using spellbinders dies. And lastly I cut out pieces of scrap paper to make the kite and banner. I used some blue twine across the top of the banner and continued the twine up to the bottom of the kite. I did the same on the other side and tucked it under the clouds. Added some wood butterflies and a couple of pre-made bows. And there you have it. Very easy to do. In fact I think the dots and dashes took the most time. Here are a couple of closeups.


Another layout I did was specific for a boy.

I first used a stencil with circles and using a spouncer, I applied a brown metallic paint at the upper left corner and the bottom right corner. I cut various sizes of various papers and layered them starting with the first one at the left side of the page and working my way across. When I had my papers down I added a piece of burlap in the centre. I did rub some gesso onto the burlap to give it some more texture. I also took a piece of corrugated paper, brushed on some gesso, and added it to the right side of the burlap piece.
For embellishments I used wood gears as shown and also a wood frame at the top and bottom of the picture. I placed some music paper behind the frames. And there you have it. I like to layer papers that go well together. I also like to rough up the edges of the pieces and do some tearing. Here is a close-up of the upper left corner.

And for all you
"HAPPY SCRAPPERS"
"Do not follow where the path may lead. Go instead where there is
no path and leave a trail." Emerson
Sunday, July 20, 2014
Customer Appreciation Sale this week!
Mark your Calendars! We are having a Customer Appreciation Sale this week!
We want to say Thank You to all our wonderful Customers!
Friday July 25th, and Saturday July 26th stop by the store and receive 20% off your entire order!
For our on-line customers, you will have from Friday July 25th until Thursday July 31 to fill your shopping carts for 20% off as well.
(not applicable to special orders or online shopping store pickups).
We hope to see you this weekend!!
We want to say Thank You to all our wonderful Customers!
Friday July 25th, and Saturday July 26th stop by the store and receive 20% off your entire order!
For our on-line customers, you will have from Friday July 25th until Thursday July 31 to fill your shopping carts for 20% off as well.
(not applicable to special orders or online shopping store pickups).
We hope to see you this weekend!!
Monday, July 14, 2014
The "NO PLAN" Mixed Media Layout
Today I thought I would share with you a mixed media layout that I did today. I have to be honest with you. I selected my picture but I had no idea or plan on how to do my layout. I decided to just go for it. If I made a huge mistake, I figured I could cover it up somehow. Below is the layout.




I knew I wanted lots of texture on the background. I first chose two pieces of patterned paper which I had in my "stuff" for a long, long time. I tore the one paper in half but curved it. I then inked the edges and adhered it to the left side of the background paper. To blend the papers together I painted a thin layer of watered down gesso over the entire surface.
I then selected stencils that I wanted to use for background texture.
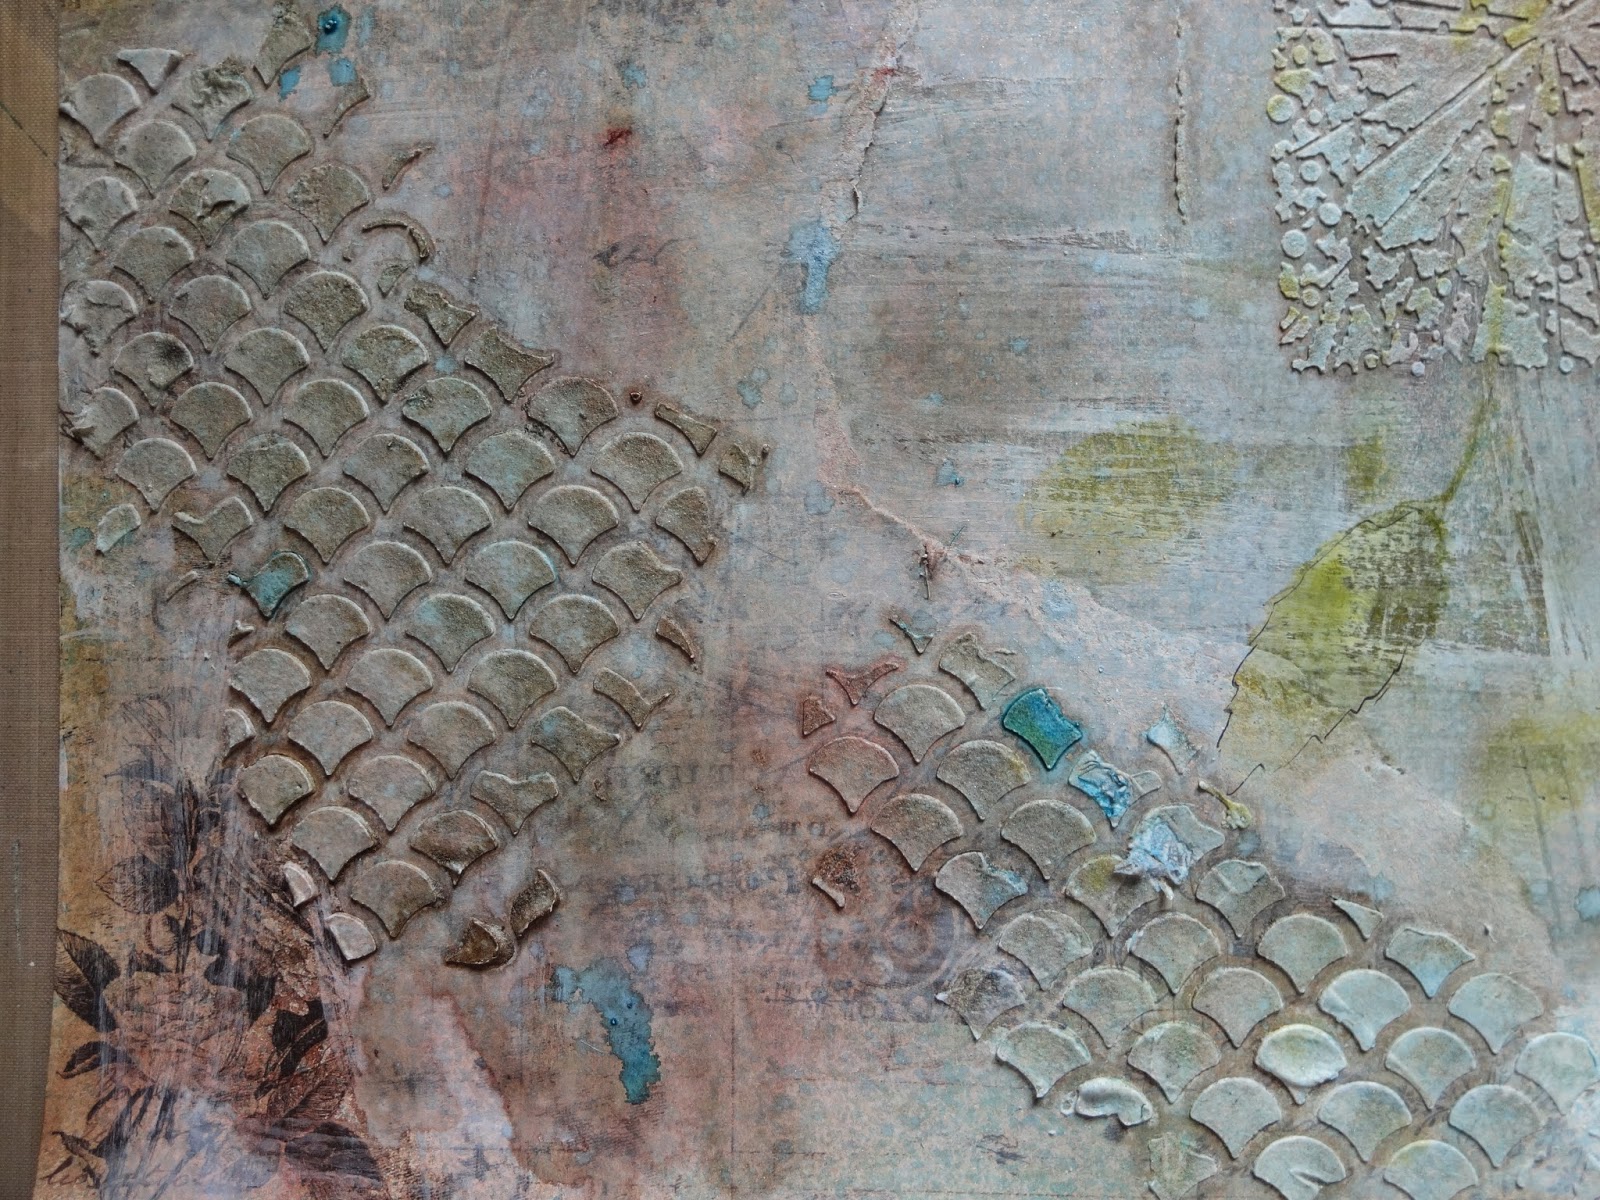
The leaf stencil I applied with Tim Holtz crushed olive distress ink. Using moulding paste I placed the stencil below the leaf one at the centre of the leaf vines. The other stencil I applied here and there with moulding paste. When the paste was dry I sprayed with a light brown spray, then a taupe spray (which had red in it) then I dripped a turquoise spray here and there. Here is a closeup to show you the different textures that I achieved.
I decided that I wanted a bit more texture so I selected another of my favourite stencils and inked it here and there using a a brown distress ink.
For the picture placement, I took a random piece of patterned paper and cut out a piece for the back of the picture which comes out from the top left corner of the picture. I also tore a few pieces from the other half of the background paper that I tore off. I heavily inked the edges and adhered them around the picture.
I had wood gears in my stash so I pulled out a few painted them with gesso, sprayed with the turquoise spray I used on the background then stamped them with a random stamp using black ink. I also took a wood frame, cut it in half, and adhered them to the right side of the picture by layering one on top of the other and off-setting the one piece. I pulled apart a few pieces of burlap and tucked them under the two upper corners and bottom left corner. I felt that the background needed some black. So I took a stamp, inked it with black ink, and randomly stamped it here and there. I also drew around the leaves of the leaf vine stencil using a black scrapbooking pen. And the final thing, I splattered white gesso here and there using a paint brush. Very easy to do and adds to the texture. Here is a closeup of a couple of sections of the completed layout.
Given the fact that I did not know what I was going to do, I was quite pleased with how it turned out. I realize that with mixed media anything goes. Don't think - just do what you like.
Until next time, this is Donna reminding you to continue being a
HAPPY SCRAPPER!!!!!
and remember
"Life is a great big canvas,
and you should throw all the paint on it you can."
Danny Kaye
Monday, July 07, 2014
Using up More Chipboard Letters
Hello everyone!!!!! Well I finally got a new computer. What a difference - I have a lot of navigating to do to learn how to fully use it. So here is my first blog to share with you. Sometime ago I did a tutorial on how to use up chipboard letters by creating a picture frame.
Here is another idea based on the same method.
I started by cutting a 4" wide x 11" long piece of white cardstock. At the left end of the strip I measured in
3 1/2" and drew a line. From the other end I measured in 2 1/2" and drew a line. The space in between the lines is where I plan on placing my picture on a piece of patterned paper 5" wide x 6" long.

I then pulled out my chipboard letters that I wanted to use up. Size, colour, shape - doesn't matter.

I cut the right side end (the 2 1/2" end) off by cutting it 1" in from the pencil line. I did this so that I could ensure that my picture section did not go over any of the letters on this end. You can also adjust the pieces to suit your picture as you may not use the same picture size as I did. Then I placed the letters onto the cardstock as shown above. When I was happy with the placement, I glued them down securely. I kept the letters to the outside of the pencil lines. You will notice that I added the #2 on the larger section. Add more numbers if you wish.
I then painted all the letters with white gesso. To be sure I did two coats. Let this dry completely.

I then took a turquoise blue spray (which matched my papers) and sprayed the letters. I used a piece of paper towel and lightly soaked up some of the spray off the letters. This is optional. When the spray was completely dry, I rubbed a bit of brown ink here and there onto the surface of the letters for an extra accent. Below is a closeup of the letters after spraying and inking.

And the completed layout.

I hope you enjoy.
Until next time
HAPPY SCRAPPING!!!!
and for my quote:
"I think, at a child's birth, if a mother could ask a fairy godmother to endow him/her with the most useful gift,
that gift should be curiosity." Eleanor Roosevelt
Subscribe to:
Posts (Atom)